CODE | Simple RFID Reader - Arduino Project 044
Arduino Programming Basic -- Making an RFID Reader
Advanced RFID with Arduino
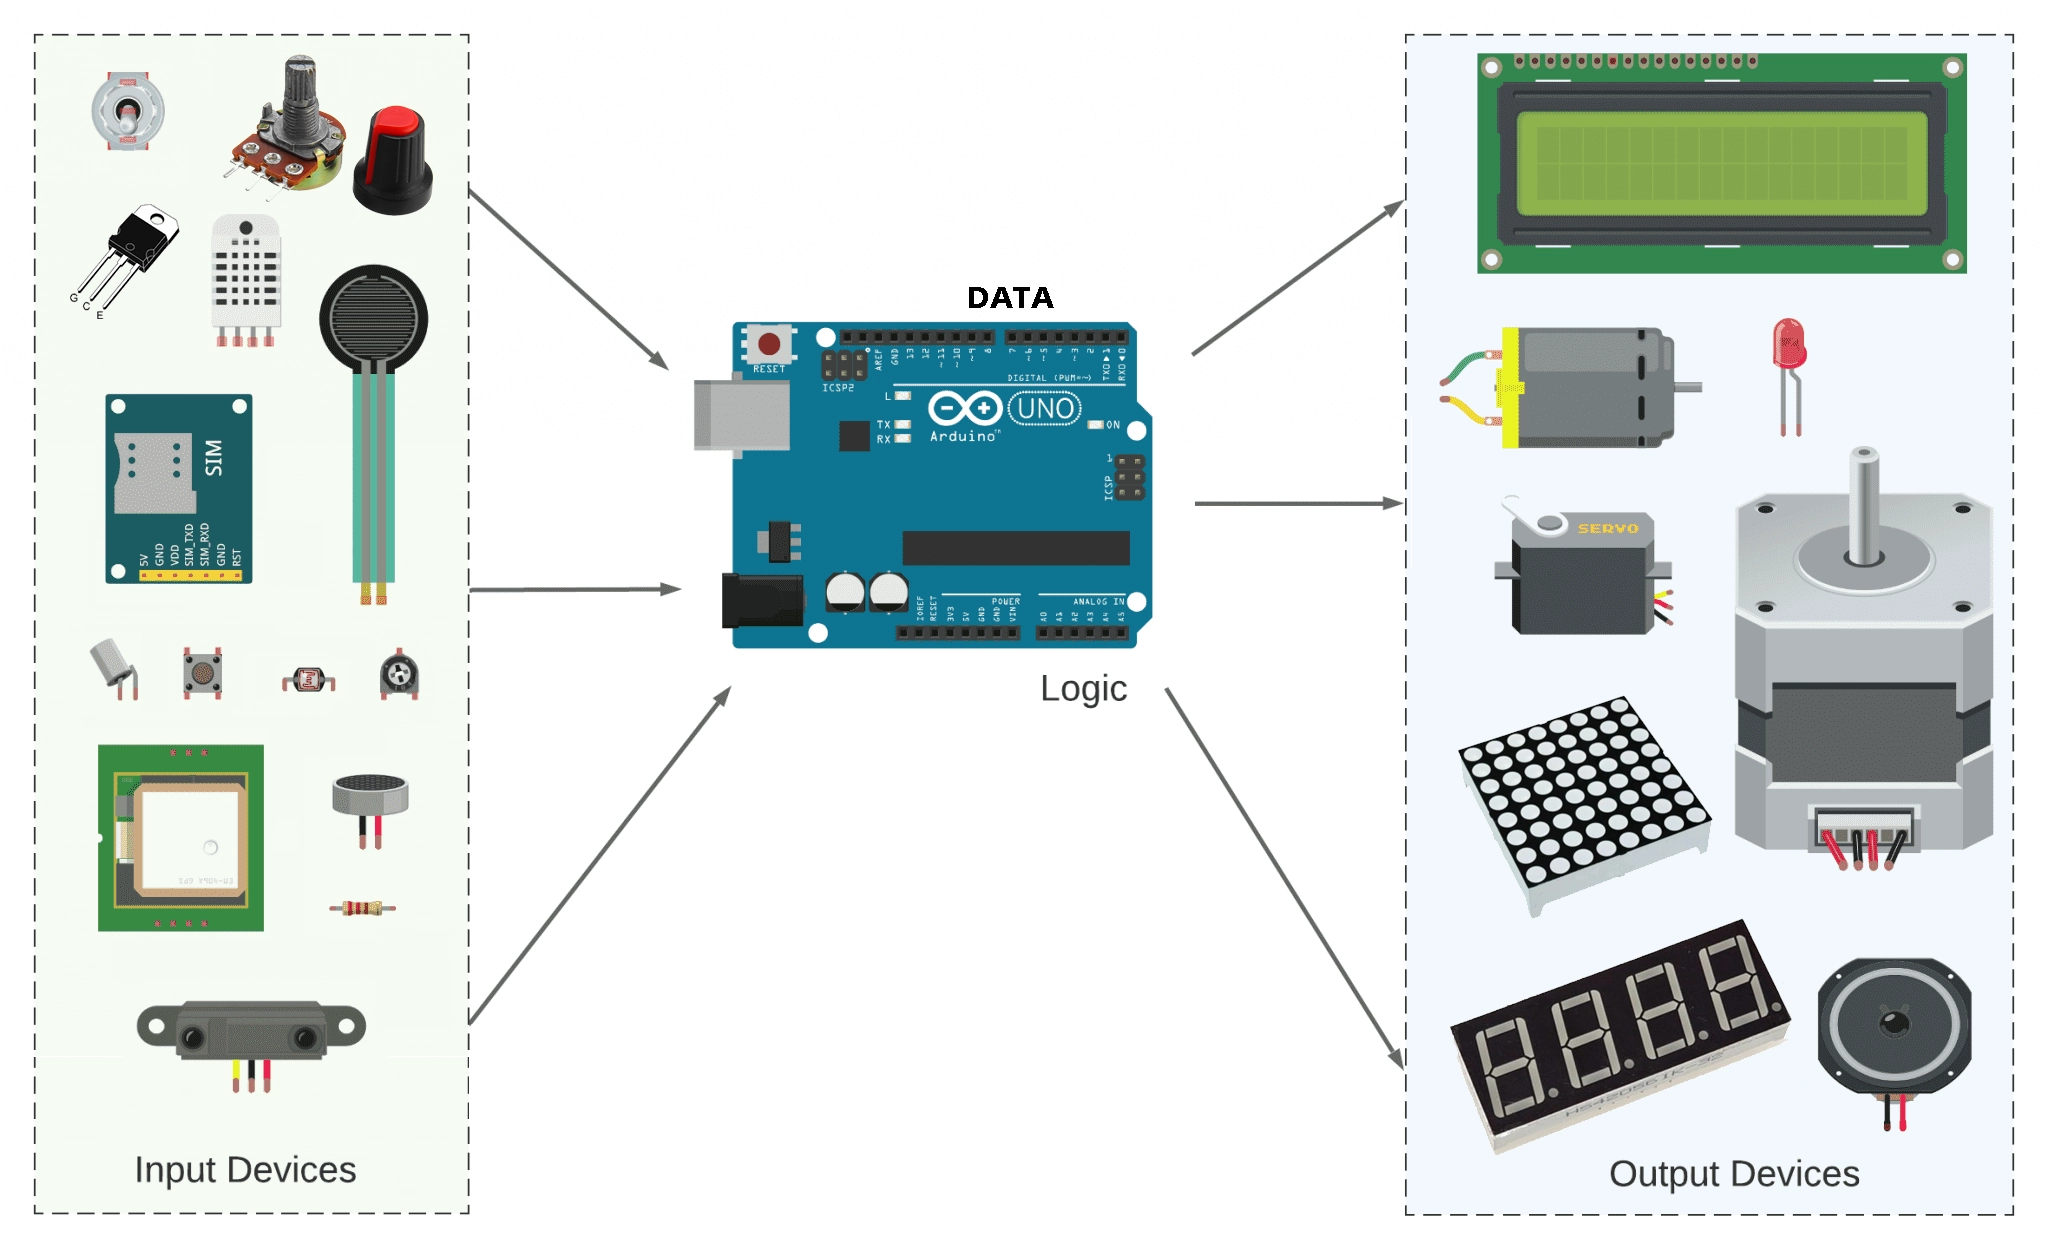
RFID (Radio Frequency Identification) technology enables wireless communication between a reader and tags for identification and data exchange. Using Arduino with RFID modules like the RC522 allows for building advanced projects such as access control systems, attendance tracking, and inventory management.
Overview of RFID with Arduino
The RFID system consists of a reader (e.g., RC522 module) and tags (passive or active). The RC522 operates at 13.56 MHz and supports SPI, I2C, and UART communication protocols, though SPI is most commonly used with Arduino. Tags store data and transmit it back to the reader when energized by its electromagnetic field.
Key Features of RC522 Module
Communication Protocols: SPI (up to 10 Mbps), I2C, UART.
Voltage: Operates at 3.3V but has 5V-tolerant pins.
Range: Typically 2-5 cm for standard tags.
Applications
Reading/writing data, UID detection, and authentication.
Project 44 Simple RFID Reader

Wiring Diagram Between RC522 and Arduino without voltage regulator

Wiring Diagram Between RC522 and Arduino with voltage regulator
As Circuit in the wiring diagram above, 1kOhM and 2kOhm pair of resistors are used to regulate 5V to 3.3V. It does not need to adjust the voltage between the Arduino pin and the MISO pin of the RC522 module. However, it is necessary to regulate the voltage between the Arduino pins and the SS, SCK, MOSI, and RST pins of the RC522 module.
// Project 44  Simple RFID Reader   Arduino-RFID-NFC

#include <SPI.h>
#include <MFRC522.h>

#define SS_PIN 10
#define RST_PIN 5

MFRC522 rfid(SS_PIN, RST_PIN);

void setup() {
  Serial.begin(9600);
  SPI.begin(); // init SPI bus
  rfid.PCD_Init(); // init MFRC522

  Serial.println("Tap RFID/NFC Tag on reader");
}

void loop() {
  if (rfid.PICC_IsNewCardPresent()) { // new tag is available
    if (rfid.PICC_ReadCardSerial()) { // NUID has been readed
      MFRC522::PICC_Type piccType = rfid.PICC_GetType(rfid.uid.sak);
      //Serial.print("RFID/NFC Tag Type: ");
      //Serial.println(rfid.PICC_GetTypeName(piccType));

      // print NUID in Serial Monitor in the hex format
      Serial.print("UID:");
      for (int i = 0; i < rfid.uid.size; i++) {
        Serial.print(rfid.uid.uidByte[i] < 0x10 ? " 0" : " ");
        Serial.print(rfid.uid.uidByte[i], HEX);
      }
      Serial.println();

      rfid.PICC_HaltA(); // halt PICC
      rfid.PCD_StopCrypto1(); // stop encryption on PCD
    }
  }
}