CODE | Digital Pressure Sensor - Arduino Project 031
Arduino Programming Basic -- Pressure Sensors
Pressure sensors are integral components in a multitude of projects, providing critical data to systems across various domains. Whether it’s for home automation, weather stations, or health monitoring, understanding how to integrate a pressure sensor with an Arduino is essential.
This article provides a comprehensive guide on how to use a pressure sensor with an Arduino. We’ll explore the connection process, dive into reading pressure sensor values using Arduino’s analog functions, and walk through a real-world example using the BMP280 Differential Pressure Sensor.
So, whether you’re a seasoned engineer or a novice maker, this guide will equip you with the knowledge you need to successfully implement pressure sensor technology into your Arduino projects.
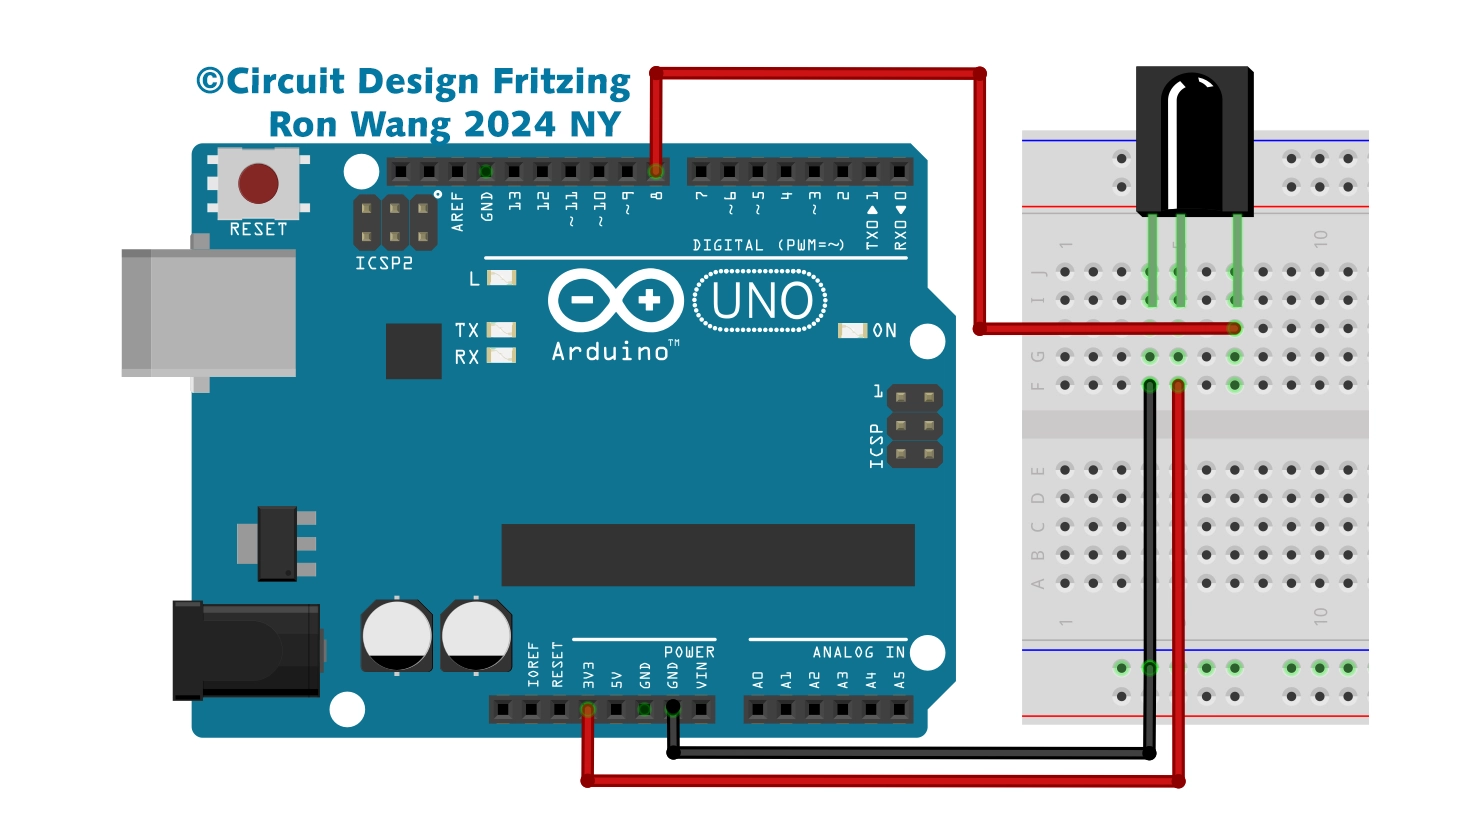
Project 31 – Digital Pressure Sensor


// Ardunio BMP280 Digital Pressure Sensor Work

#include <Wire.h>
#include <SPI.h>
#include <Adafruit_BMP280.h>
#define BMP280_ADDRESS 0x76
Adafruit_BMP280 bmp; // I2C

void setup() {
  Serial.begin(9600);
  while ( !Serial ) delay(100);   // wait for native usb
  Serial.println(F("BMP280 test"));
  unsigned status;
  status = bmp.begin(BMP280_ADDRESS);
  if (!status) {
    Serial.println(F("Could not find a valid BMP280 sensor, check wiring or "
                      "try a different address!"));
    Serial.print("SensorID was: 0x"); Serial.println(bmp.sensorID(),16);
    Serial.print("        ID of 0xFF probably means a bad address, a BMP 180 or BMP 085\n");
    Serial.print("   ID of 0x56-0x58 represents a BMP 280,\n");
    Serial.print("        ID of 0x60 represents a BME 280.\n");
    Serial.print("        ID of 0x61 represents a BME 680.\n");
    while (1) delay(10);
  }

   /* Default settings from the datasheet. */
  bmp.setSampling(Adafruit_BMP280::MODE_NORMAL,     /* Operating Mode. */
                  Adafruit_BMP280::SAMPLING_X2,     /* Temp. oversampling */
                  Adafruit_BMP280::SAMPLING_X16,    /* Pressure oversampling */
                  Adafruit_BMP280::FILTER_X16,      /* Filtering. */
                  Adafruit_BMP280::STANDBY_MS_500); /* Standby time. */
}

void loop() {
    Serial.print(F("Temperature = "));
    Serial.print(bmp.readTemperature());
    Serial.println(" *C");
    Serial.print(F("Pressure = "));
    Serial.print(bmp.readPressure());
    Serial.println(" Pa");
    Serial.print(F("Approx altitude = "));
    Serial.print(bmp.readAltitude(1013.25)); /* Adjusted to local forecast! */
    Serial.println(" m");
    Serial.println();
    delay(2000);
}