CODE | TM1637 4Digital 7Segment Display Module - Arduino Project 034
A standard 4-digit 7-segment display is needed for clock, timer and counter projects, but it usually requires 12 connections. The TM1637 module makes it easier by only requiring 4 connections: 2 for power and 2 for controlling the segments.
A TM1637 module typically consists of four 7-segment LEDs and a colon-shaped LED in the middle: It is ideal for displaying time in hours and minutes, or minutes and seconds, or scores of two teams.
Project 34 Interfacing TM1637 4 Digital 7 Segment Display Module

4 Digital 7 Segment Display

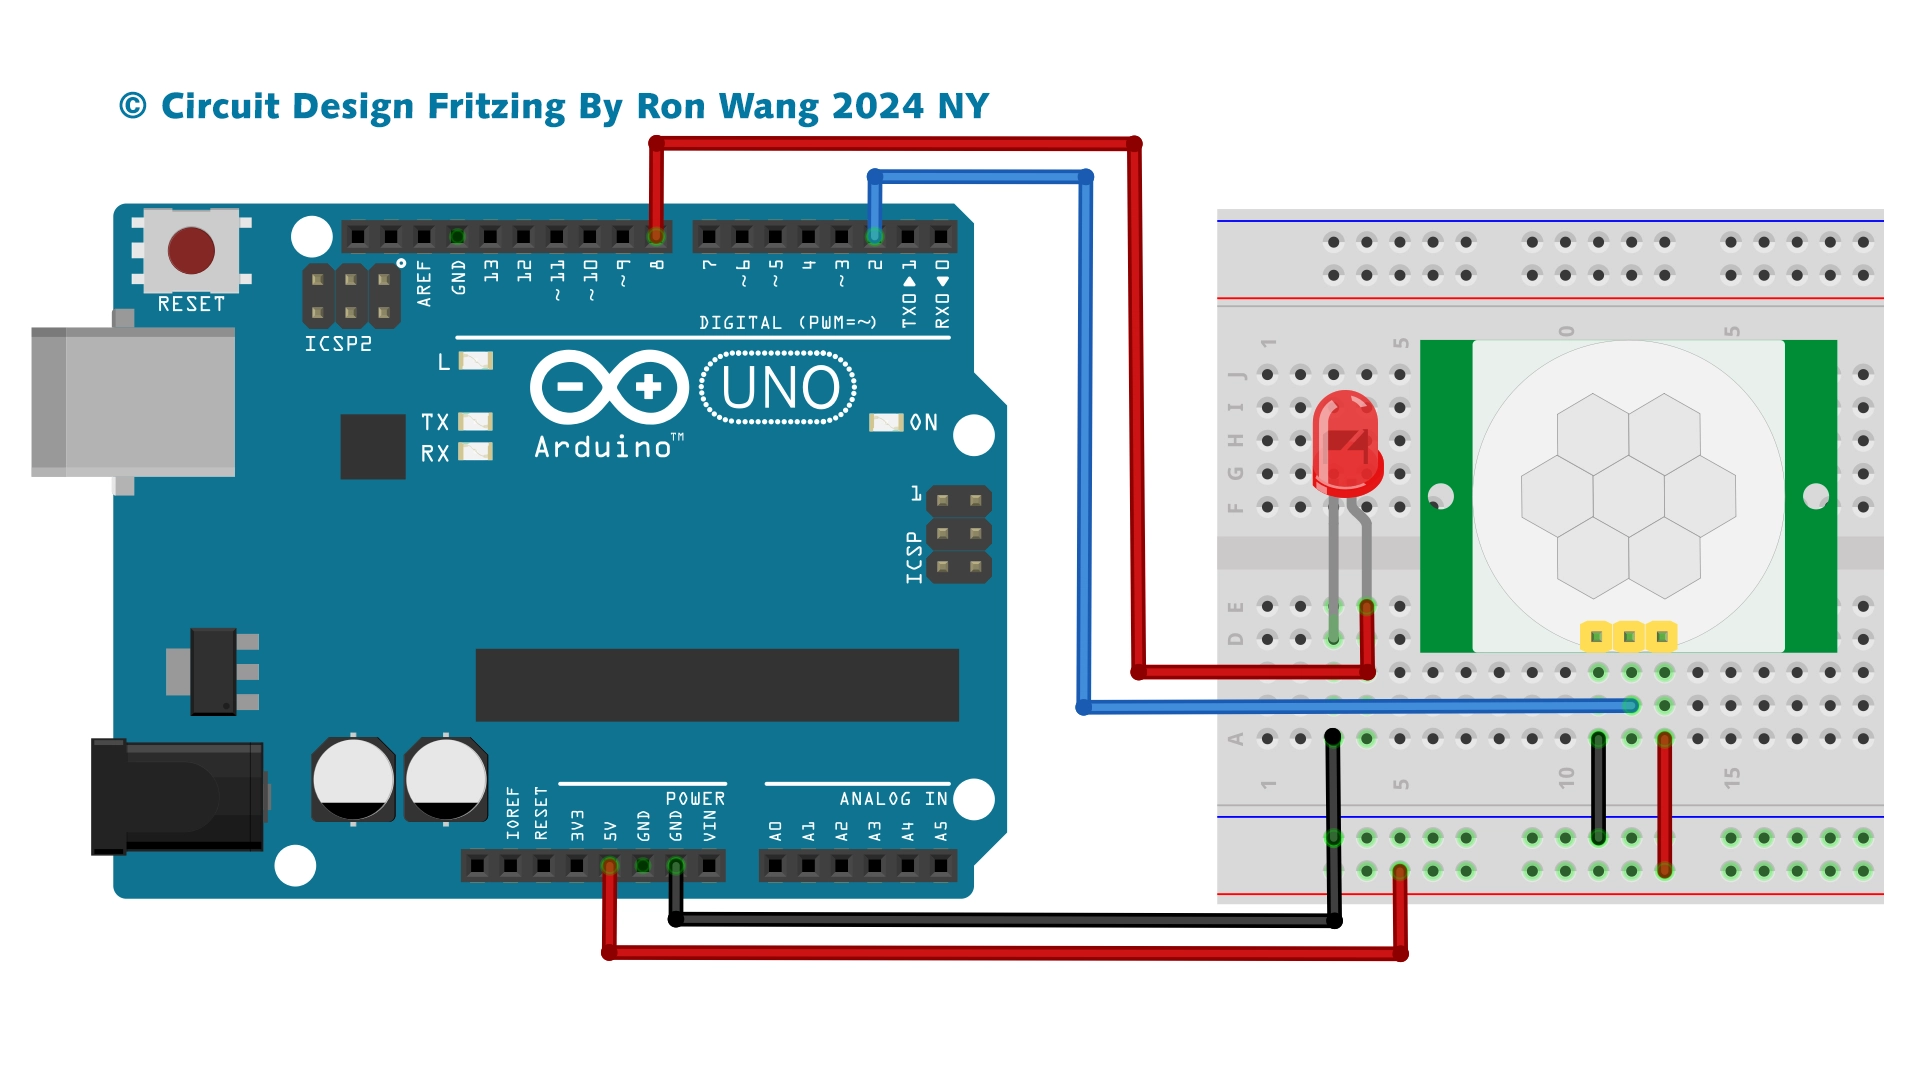
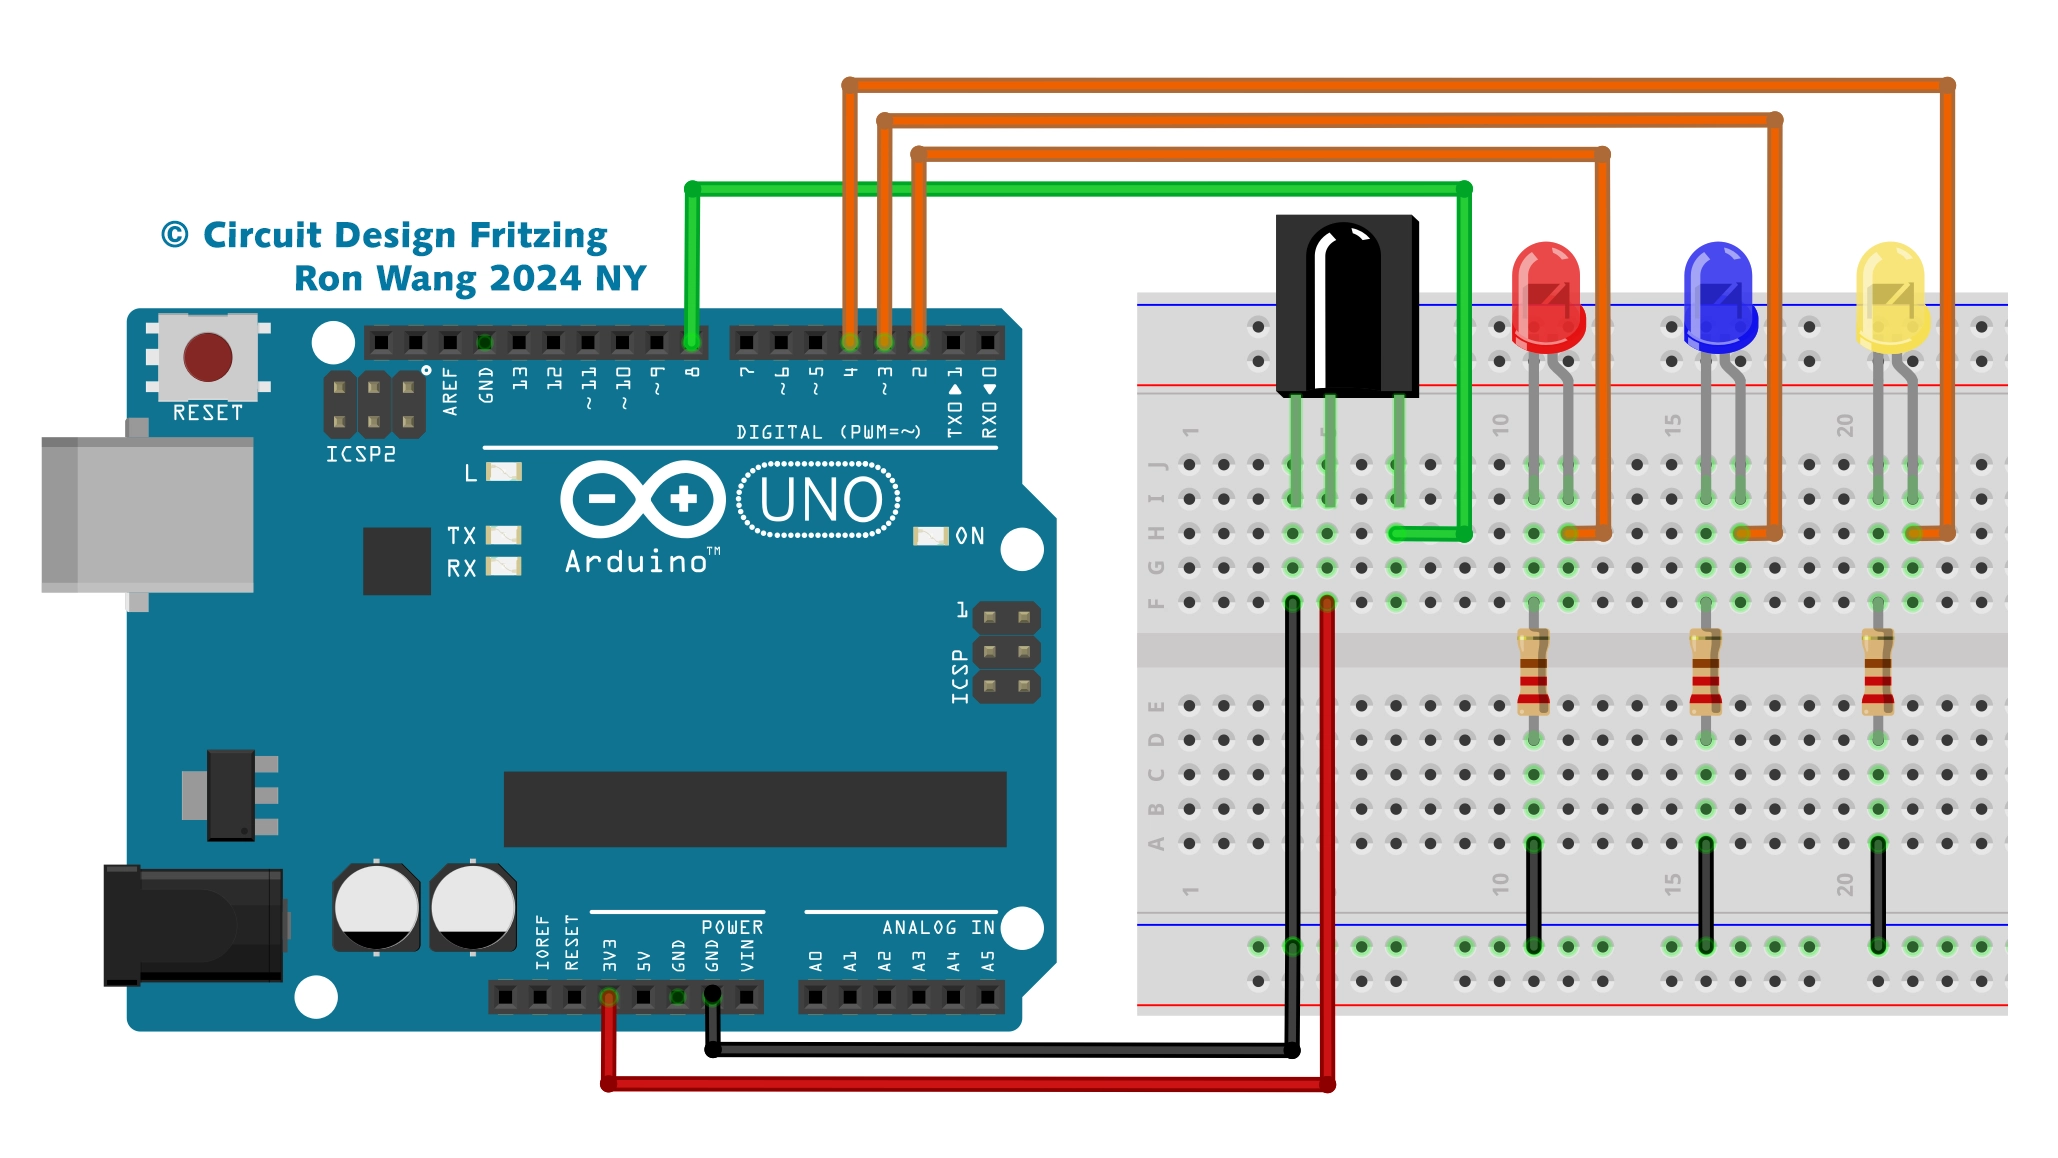
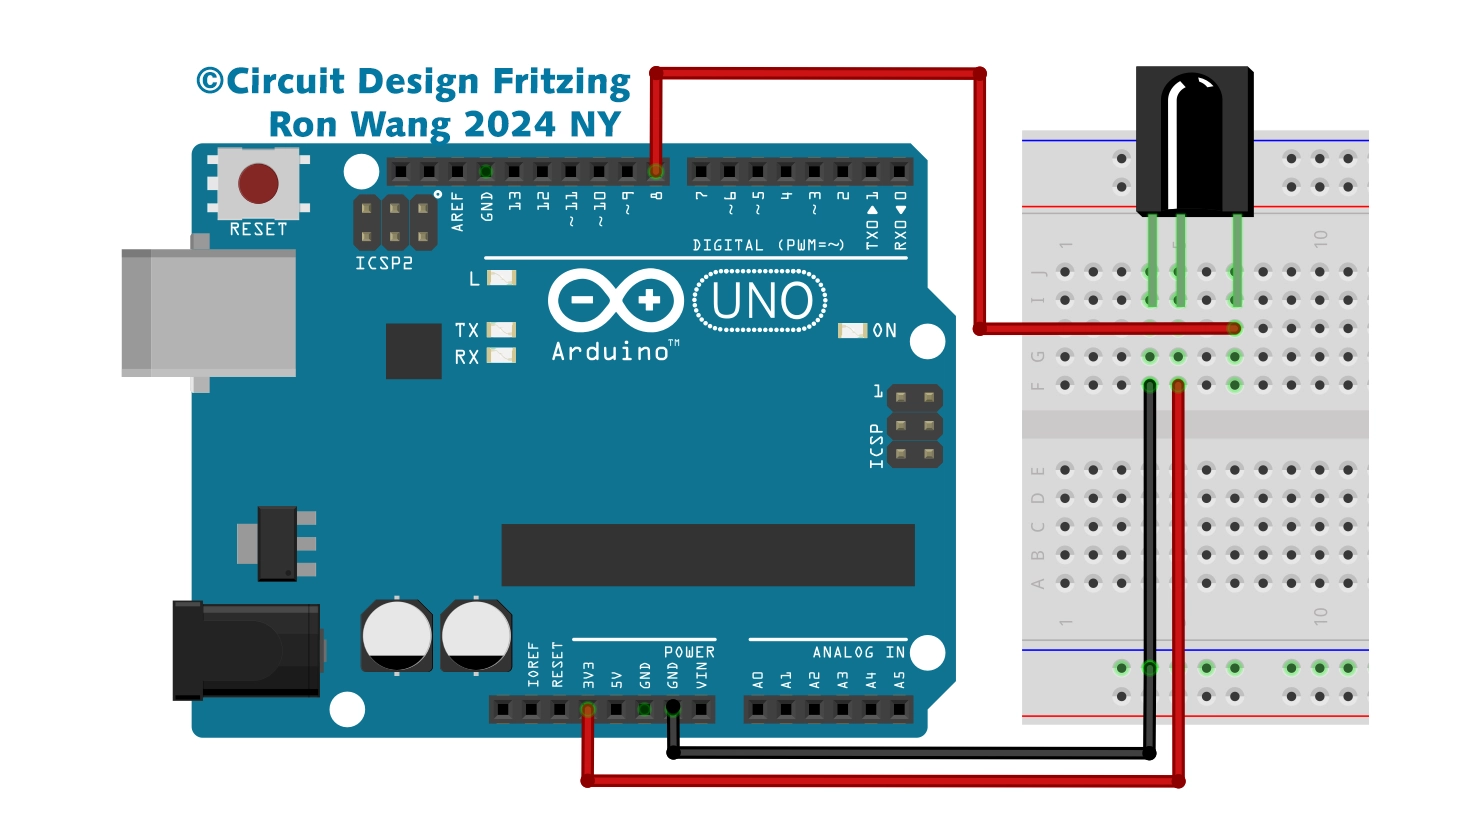
TM1637 4 Digital 7 Segment Display Circuit

TM1637 4 Digital 7 Segment Display Schematic
/* Coding Ron Wang
   Nov.27th 2024
   Autaba support for coding hardware
   Project 034 TM1637 4 digit 7 segment display with Arduino.
 */

#include "TM1637Display.h"
#define CLK 2
#define DIO 3
TM1637Display display = TM1637Display(CLK, DIO);  // Create display object of type TM1637 Display
const uint8_t data[] = {0xff, 0xff, 0xff, 0xff};  // Create array that turns all segments on
const uint8_t blank[] = {0x00, 0x00, 0x00, 0x00}; // Create array that turns all segments off
// You can set the individual segments per digit to spell words or create other symbols
const uint8_t DONE[] = {
  SEG_B | SEG_C | SEG_D | SEG_E | SEG_G,           // d
  SEG_A | SEG_B | SEG_C | SEG_D | SEG_E | SEG_F,   // O
  SEG_C | SEG_E | SEG_G,                           // n
  SEG_A | SEG_D | SEG_E | SEG_F | SEG_G            // E
};
// Create degree Celsius symbol:
const uint8_t celsius[] = {
  SEG_A | SEG_B | SEG_F | SEG_G,  // Circle
  SEG_A | SEG_D | SEG_E | SEG_F   // C
};

void setup() {
  // Clear the display:
  display.clear();
  delay(1000);
}

void loop() {
  // Set the brightness:
  display.setBrightness(7);
  // All segments on:
  display.setSegments(data);
  delay(1000);
  display.clear();
  delay(1000);
  // Show counter:
  int i;
  for (i = 0; i < 101; i++) {
    display.showNumberDec(i);
    delay(50);
  }
  delay(1000);
  display.clear();
  delay(1000);
  // Print number in different locations, loops 2 times:
  int j;
  for (j = 0; j < 2; j++) {
    for (i = 0; i < 4; i++) {
      display.showNumberDec(i, false, 1, i);
      delay(500);
      display.clear();
    }
  }

  delay(1000);
  display.clear();
  delay(1000);
  // Set brightness (0-7):
  int k;
  for (k = 0; k < 8; k++) {
    display.setBrightness(k);
    display.setSegments(data);
    delay(500);
  }
  delay(1000);
  display.clear();
  delay(1000);
  // Print 1234 with the center colon:
  display.showNumberDecEx(1234, 0b11100000, false, 4, 0);
  delay(1000);
  display.clear();
  delay(1000);
  int temperature = 24;
  display.showNumberDec(temperature, false, 2, 0);
  display.setSegments(celsius, 2, 2);
  delay(1000);
  display.clear();
  delay(1000);
  display.setSegments(DONE);
  while(1);
}