CODE | How to Connect Remote Control - Arduino Project 047
In the first time I purchase this remote, I don't know why the operating mode is only non-latched, I was wondering why?. Maybe because of the cheap price, so the producer doesn't add a relay to it. So, then I try to find a way so this remote can be used for controlling power plug with latched operating mode (instead of non-latched mode).
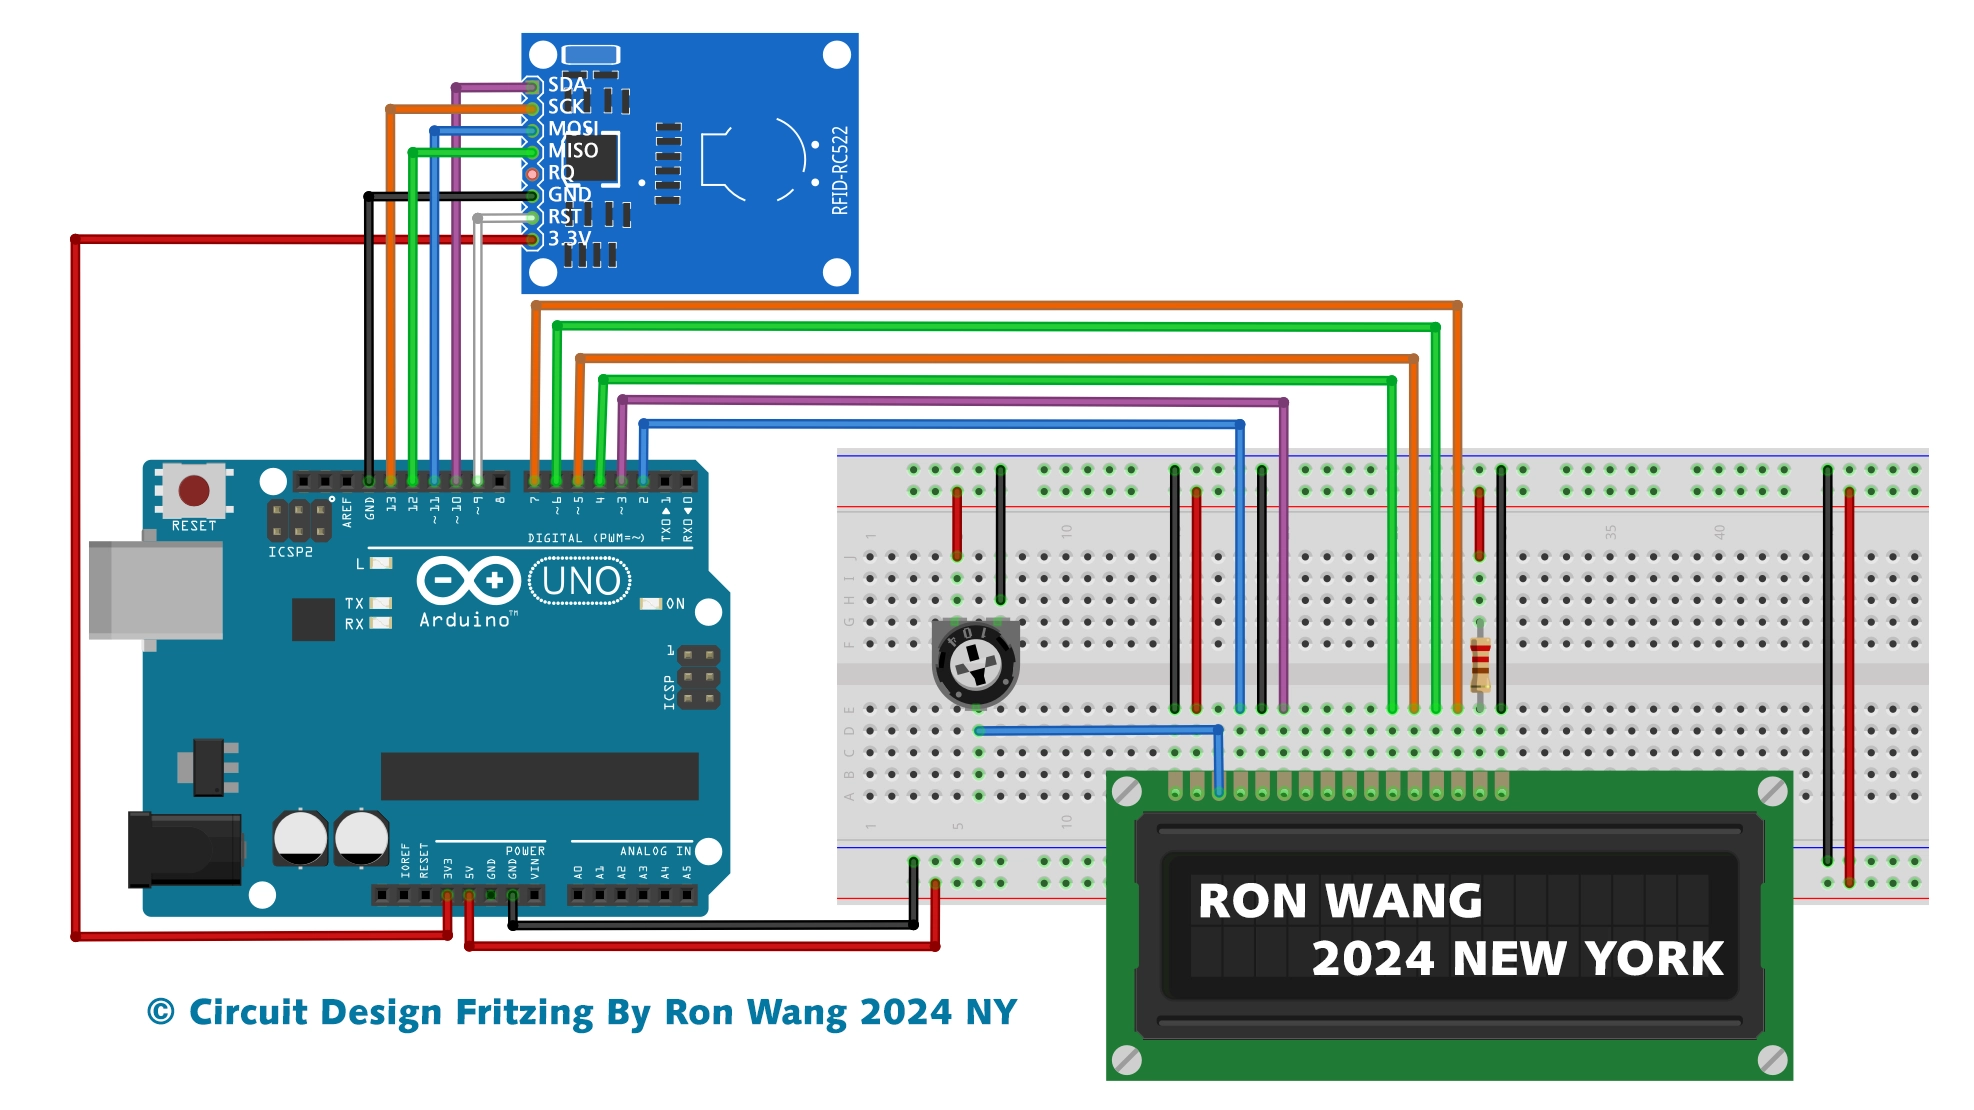
Project 047 How to Connect Remote Control 4 Channel to Arduino

// constants won't change. They're used here to set pin numbers:
const   int button1 = 6;    // the number of the pushbutton pin
const int button2 = 7;
const int ledPin1 = 8;      // the number of the LED pin
const int ledPin2   = 9;
// Variables will change:
int ledState1 = HIGH;         // the current   state of the output pin
int ledState2 = HIGH;
int buttonState1;             //   the current reading from the input pin
int buttonState2;
int lastButtonState1   = LOW;   // the previous reading from the input pin
int lastButtonState2 = LOW;
//   the following variables are unsigned long's because the time, measured in miliseconds,
//   will quickly become a bigger number than can be stored in an int.
unsigned long   lastDebounceTime = 0;  // the last time the output pin was toggled
unsigned long   debounceDelay = 50;    // the debounce time; increase if the output flickers
void   setup() {
  pinMode(button1, INPUT);
  pinMode(button2, INPUT);
  pinMode(ledPin1,   OUTPUT);
  pinMode(ledPin2, OUTPUT);
  // set initial LED state
  digitalWrite(ledPin1,   ledState1);
  digitalWrite(ledPin2, ledState2);
}
void loop() {
   // read the state of the switch into a local variable:
  int reading1 = digitalRead(button1);
   int reading2 = digitalRead(button2);

  // check to see if you just pressed   the button
  // (i.e. the input went from LOW to HIGH),  and you've waited
   // long enough since the last press to ignore any noise:
  // If the switch   changed, due to noise or pressing:
  if (reading1 != lastButtonState1) {
     // reset the debouncing timer
    lastDebounceTime = millis();
  }
   if ((millis() - lastDebounceTime) > debounceDelay) {
    // whatever the reading   is at, it's been there for longer
    // than the debounce delay, so take it   as the actual current state:
    // if the button state has changed:
     if (reading1 != buttonState1) {
      buttonState1 = reading1;
      //   only toggle the LED if the new button state is HIGH
      if (buttonState1 ==   HIGH) {
        ledState1 = !ledState1;
      }
    }
  }
  //   set the LED:
  digitalWrite(ledPin1, ledState1);
  // save the reading.   Next time through the loop,
  // it'll be the lastButtonState:
  lastButtonState1   = reading1;


   // If the switch changed, due to noise or pressing:
   if (reading2 != lastButtonState2) {
    // reset the debouncing timer
    lastDebounceTime   = millis();
  }
  if ((millis() - lastDebounceTime) > debounceDelay) {
     // whatever the reading is at, it's been there for longer
    // than the   debounce delay, so take it as the actual current state:
    // if the button   state has changed:
    if (reading2 != buttonState2) {
      buttonState2   = reading2;
      // only toggle the LED if the new button state is HIGH
       if (buttonState2 == HIGH) {
        ledState2 = !ledState2;
      }
     }
  }
  // set the LED:
  digitalWrite(ledPin2, ledState2);
   // save the reading.  Next time through the loop,
  // it'll be the lastButtonState:
   lastButtonState2 = reading2;
}