CODE | LED Interactive Traffic Lights - Arduino Project 004
This time you are going to extend the previous project to include a set of pedestrian lights and a pedestrian push button to request to cross the road. The Arduino will react when the button is pressed by changing the state of the lights to make the cars stop and allow the pedestrian to cross safely.
This is the first time you are going to interact with the Arduino and cause it to do something when you change the state of a button that the Arduino is watching. In this project, you will also learn how to create your own functions in code.
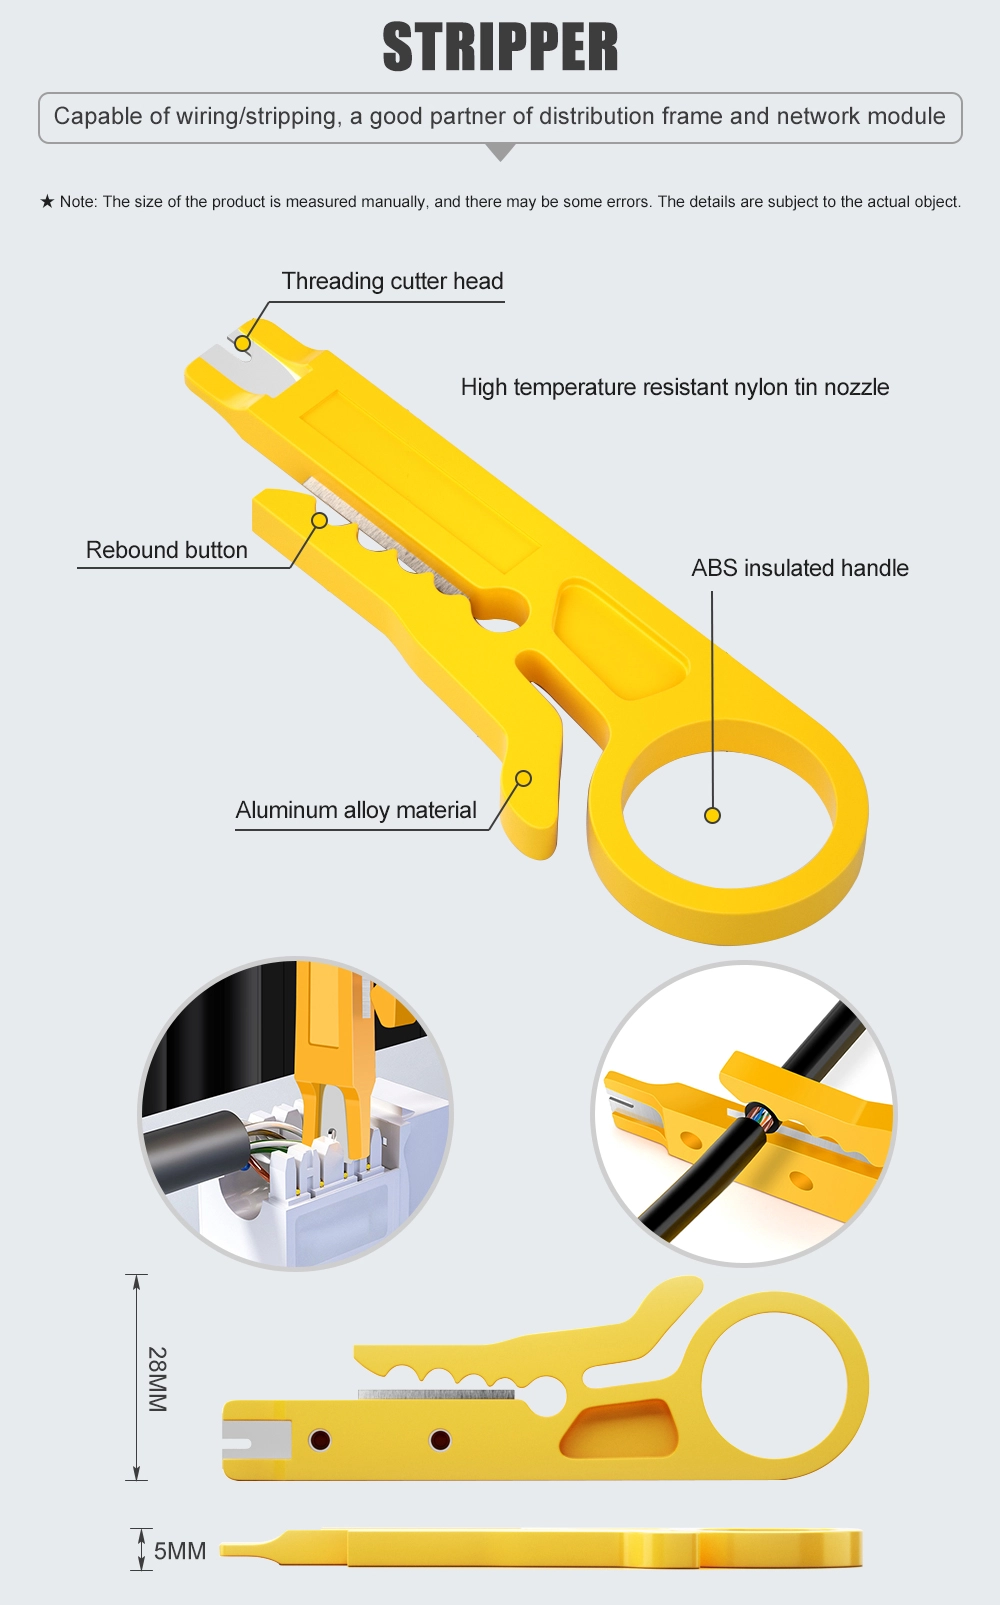
From now on, I will no longer list the breadboard and jumper wires in the parts required list. Note that you will always need these basic components.
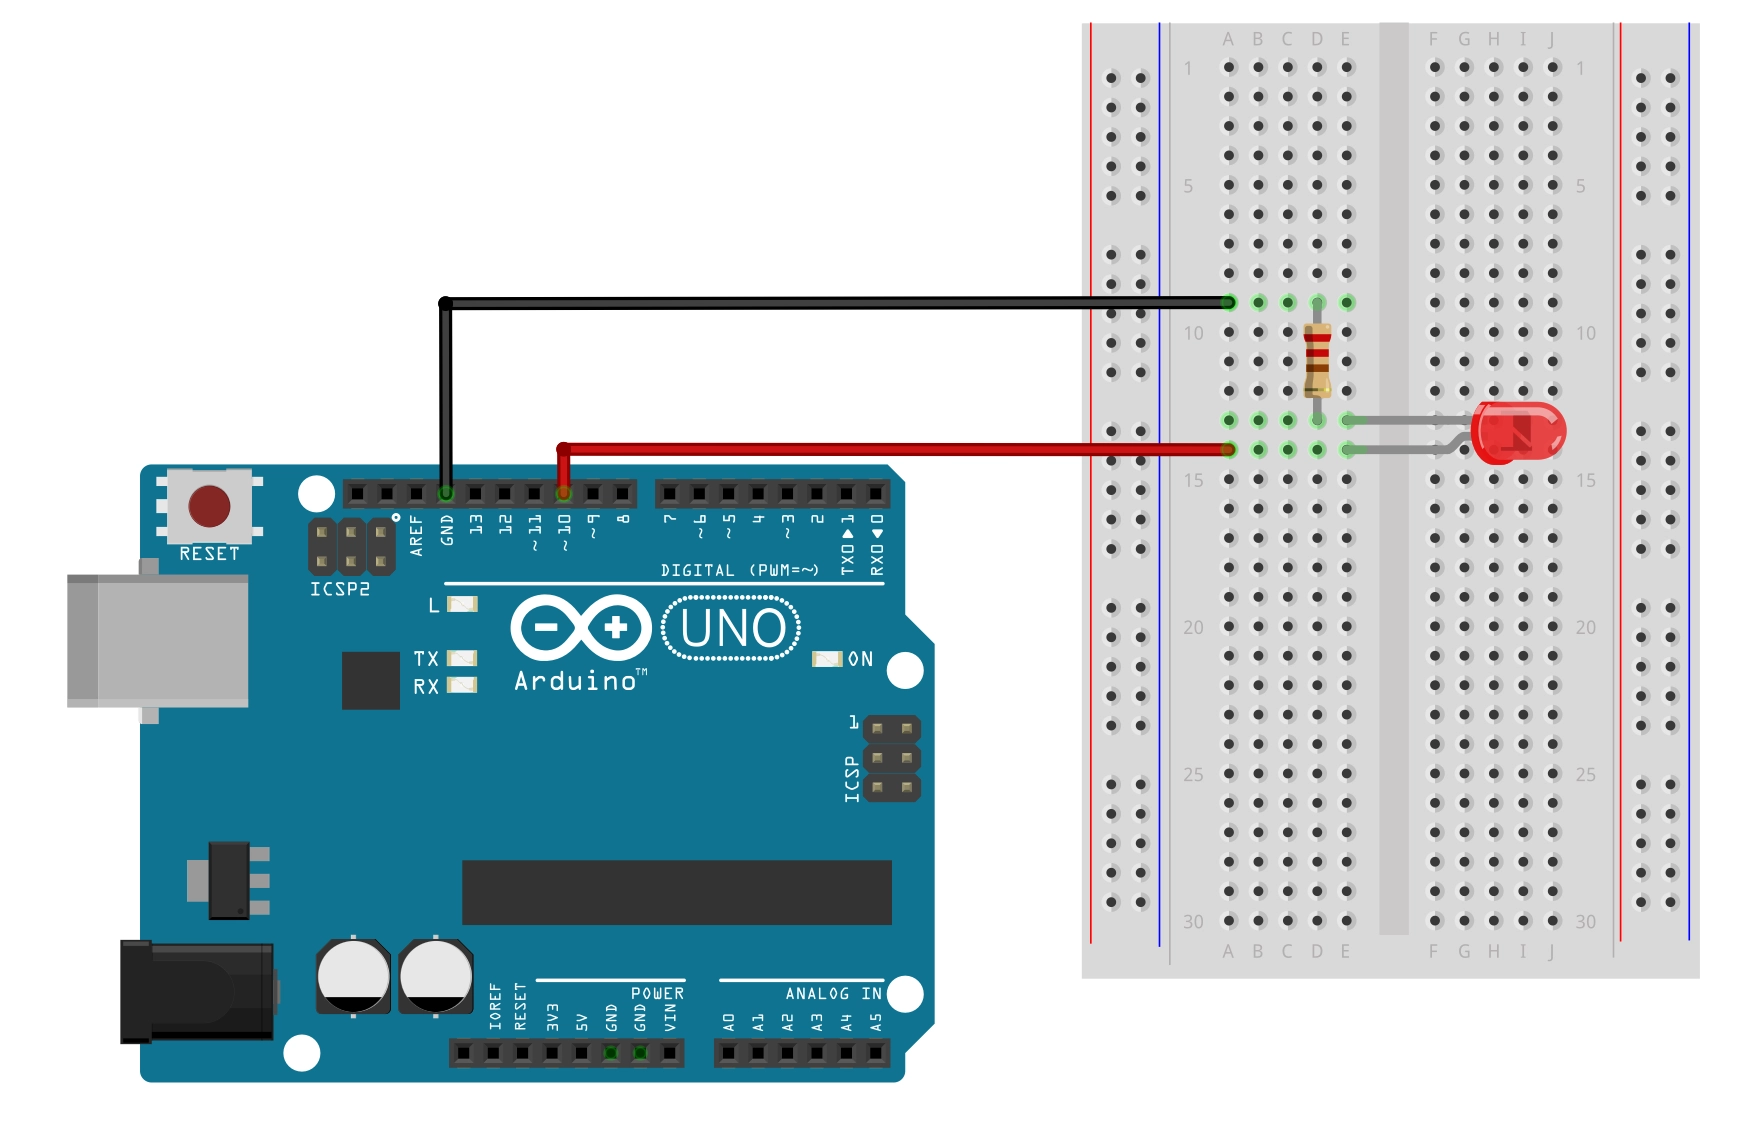
Project 4 -Interactive Traffic Lights


/* Coding Ron Wang
   June 11st 2024
   Autaba support for coding hardwarec
 */
// Project 4 - Interactive LED Traffic Lights

int carRed = 10; // assign the car lights
int carYellow = 9;
int carGreen = 8;
int pedRed = 7; // assign the pedestrian lights
int pedGreen = 6;
int button = 2; // button pin
int crossTime = 5000; // time alloyoud to cross
unsigned long changeTime; // time since button pressed
void setup() {
 pinMode(carRed, OUTPUT);
 pinMode(carYellow, OUTPUT);
 pinMode(carGreen, OUTPUT);
 pinMode(pedRed, OUTPUT);
 pinMode(pedGreen, OUTPUT);
 pinMode(button, INPUT); // button on pin 2
 // turn on the green light
 digitalWrite(carGreen, HIGH);
 digitalWrite(pedRed, HIGH);
}
void loop() {
 int state = digitalRead(button);
 /* check if button is pressed and it is over 5 seconds since last button press */
 if (state == HIGH && (millis() - changeTime) > 5000) {
 // Call the function to change the lights
 changeLights();
 }
}
void changeLights() {
 digitalWrite(carGreen, LOW); // green off
 digitalWrite(carYellow, HIGH); // yellow on
 delay(2000); // wait 2 seconds
 digitalWrite(carYellow, LOW); // yellow off
 digitalWrite(carRed, HIGH); // red on
 delay(1000); // wait 1 second till its safe
 digitalWrite(pedRed, LOW); // ped red off
 digitalWrite(pedGreen, HIGH); // ped green on
 delay(crossTime); // wait for preset time period
 // flash the ped green
 for (int x=0; x<10; x++) {
 digitalWrite(pedGreen, HIGH);
 delay(250);
 digitalWrite(pedGreen, LOW);
 delay(250);
 }
 // turn ped red on
 digitalWrite(pedRed, HIGH);
 delay(500);
 digitalWrite(carYellow, HIGH); // yellow on
 digitalWrite(carRed, LOW); // red off
 delay(1000);
 digitalWrite(carGreen, HIGH);
 digitalWrite(carYellow, LOW); // yellow off
 // record the time since last change of lights
 changeTime = millis();
 // then return to the main program loop
}