
CODE | LED Dot Matrix Display Pong Game - Arduino Project 022
This project was hard going and a lot to take in. So, for Project 22 you are going to create a simple game with simple code using the dot matrix display and a potentiometer. This time you are going to use one of the many available libraries for controlling LED dot matrix displays to see how much easier it can make your life when coding.
Project 22 – LED Dot Matrix Display – Pong game
/* Coding Ron Wang
   Oct.15th 2024
   Autaba support for coding hardware
   Project 22 LED Dot Matrix – Pong Game
 */

#include "LedControl.h"

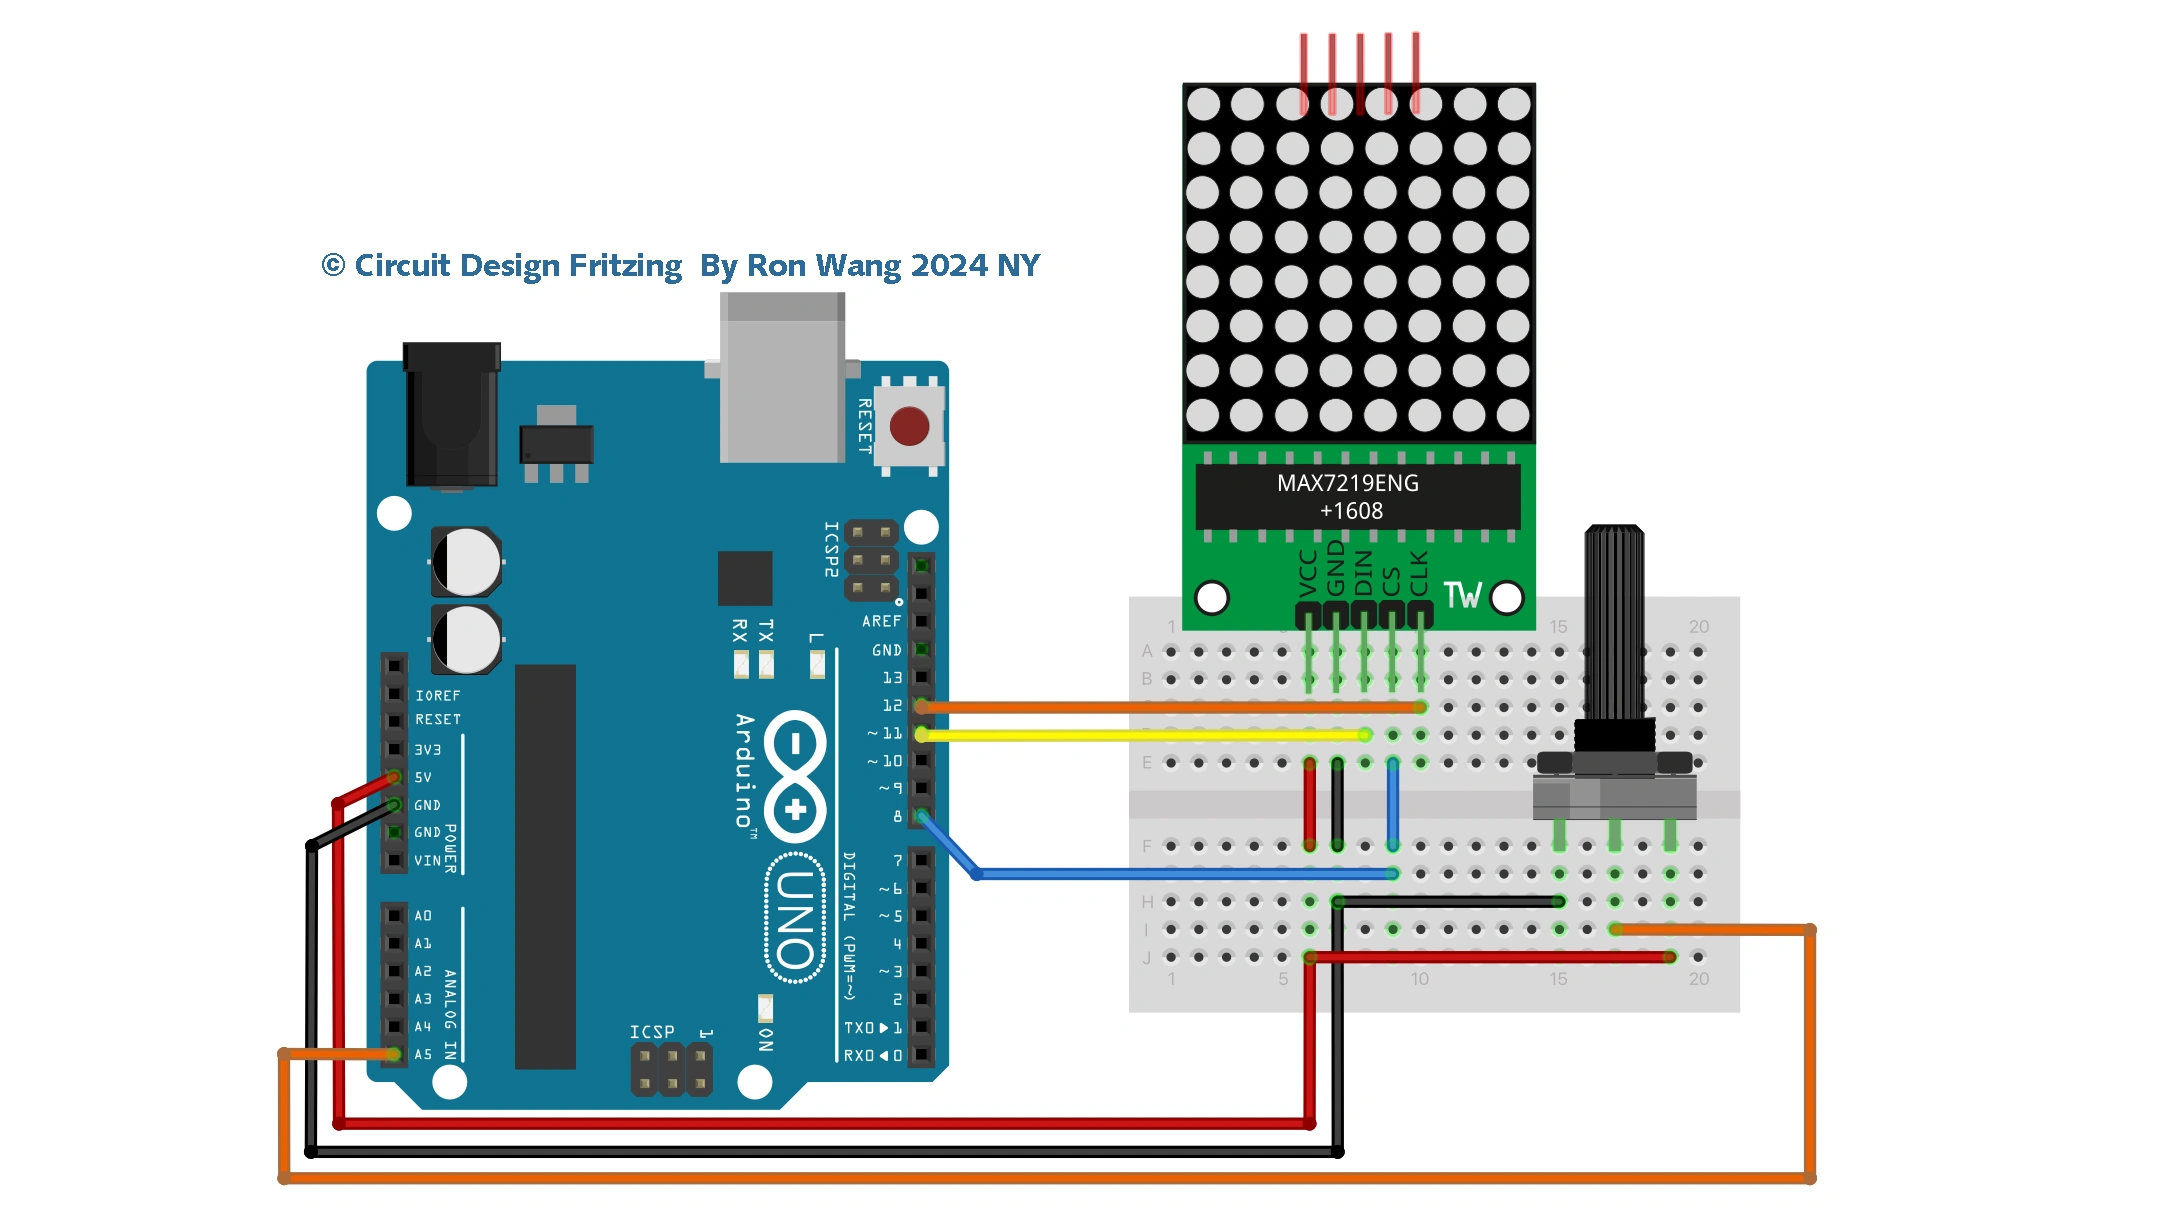
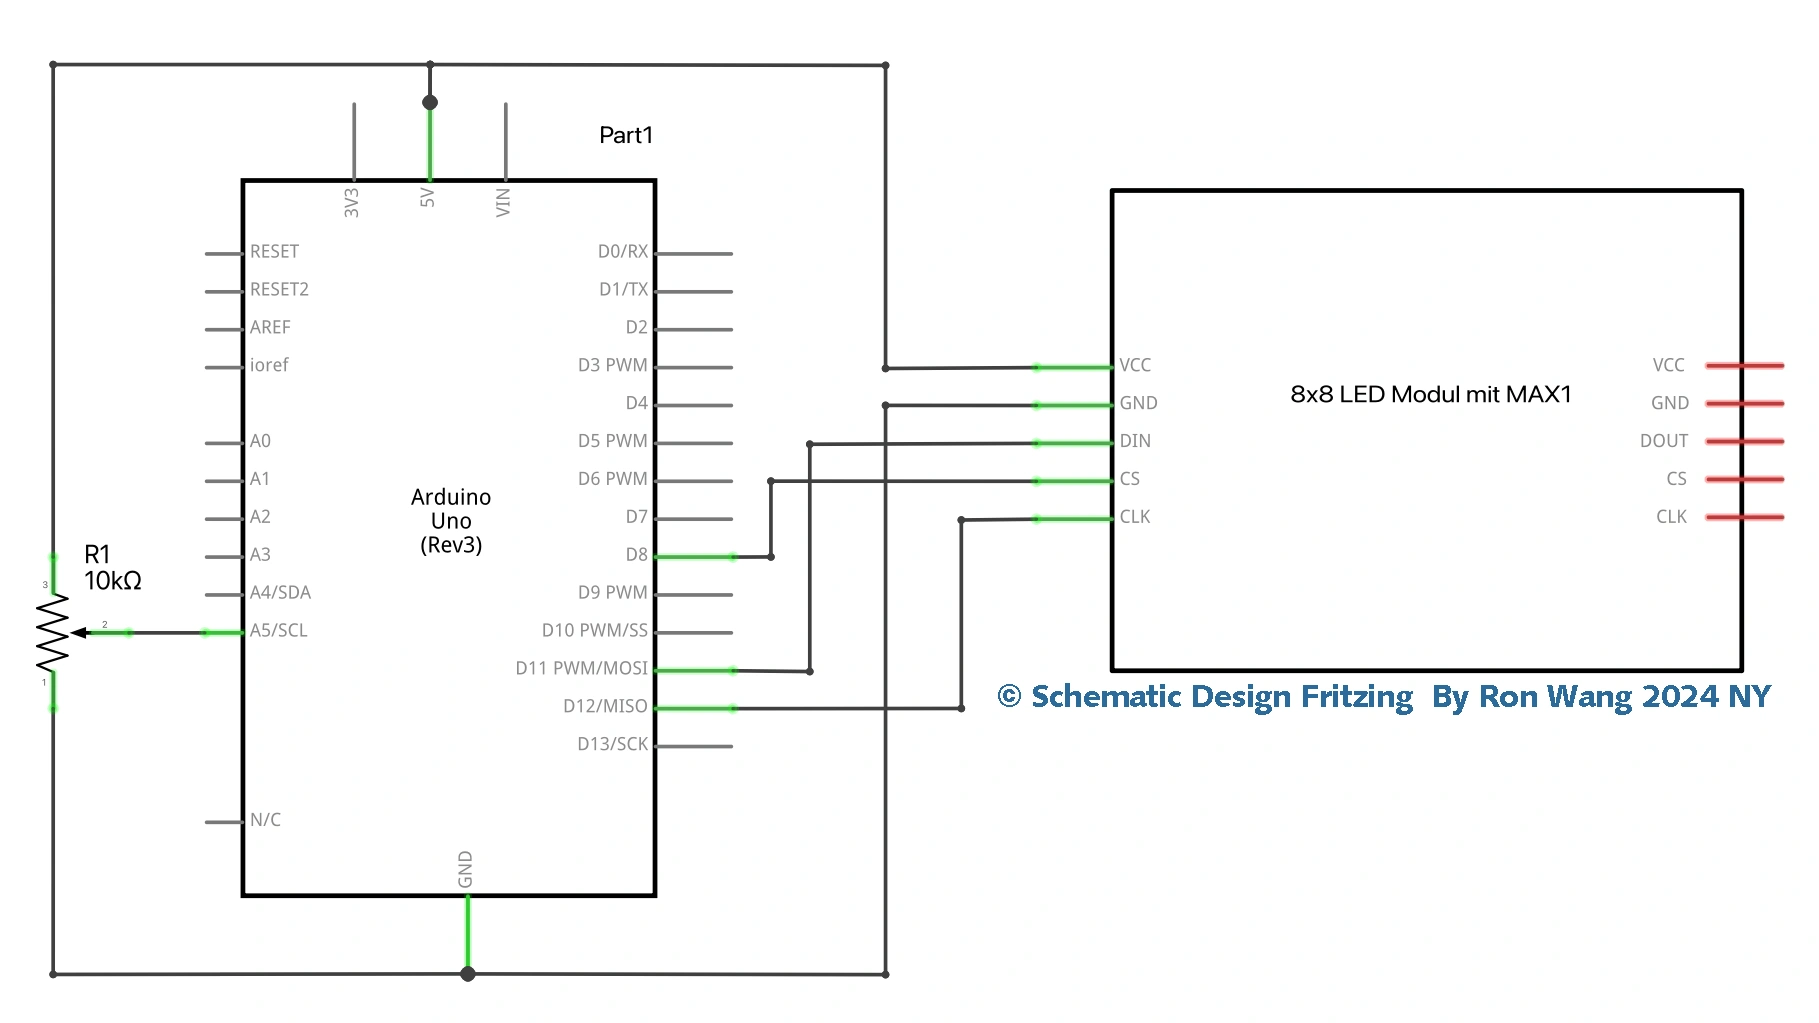
LedControl myMatrix = LedControl(11, 12, 8, 1); // create an instance of a Matrix
/*
DIN connects to pin 11
CLK connects to pin 12
CS  connects to pin 8
*/

int column = 1, row = random(8)+1; // decide where the ball will start
int directionX = 1, directionY = 1; // make sure it heads from left to right first
int paddle1 = 5, paddle1Val; // Pot pin and value
int speed = 300;
int counter = 0, mult = 10;

void setup()
{
 myMatrix.shutdown(0, false); // enable display
 myMatrix.setIntensity(0, 8); // Set the brightness to medium
 myMatrix.clearDisplay(0); // clear the display
 randomSeed(analogRead(0));
}

void loop()
{
 paddle1Val = analogRead(paddle1);
 paddle1Val = map(paddle1Val, 200, 1024, 1,6);
 column += directionX;
 row += directionY;
 if (column == 6 && directionX == 1 && (paddle1Val == row || paddle1Val+1 == row || paddle1Val+2 == row)) {directionX = -1;}
 if (column == 0 && directionX == -1 ) {directionX = 1;}
 if (row == 7 && directionY == 1 ) {directionY = -1;}
 if (row == 0 && directionY == -1 ) {directionY = 1;}
 if (column == 7) { oops();}
 myMatrix.clearDisplay(0); // clear the screen for next animation frame
 myMatrix.setLed(0, column, row, HIGH);
 myMatrix.setLed(0, 7, paddle1Val, HIGH);
 myMatrix.setLed(0, 7, paddle1Val+1, HIGH);
 myMatrix.setLed(0, 7, paddle1Val+2, HIGH);
 if (!(counter % mult)) {speed -= 5; mult * mult;}
 delay(speed);
 counter++;
}

void oops() {
 for (int x=0; x<3; x++) {
 myMatrix.clearDisplay(0);
 delay(250);
 for (int y=0; y<8; y++) {
 myMatrix.setRow(0, y, 255);
 }
 delay(250);
 }
 counter=0; // reset all the values
 speed=300;
 column=1;
 row = random(8)+1; // choose a new starting location
}