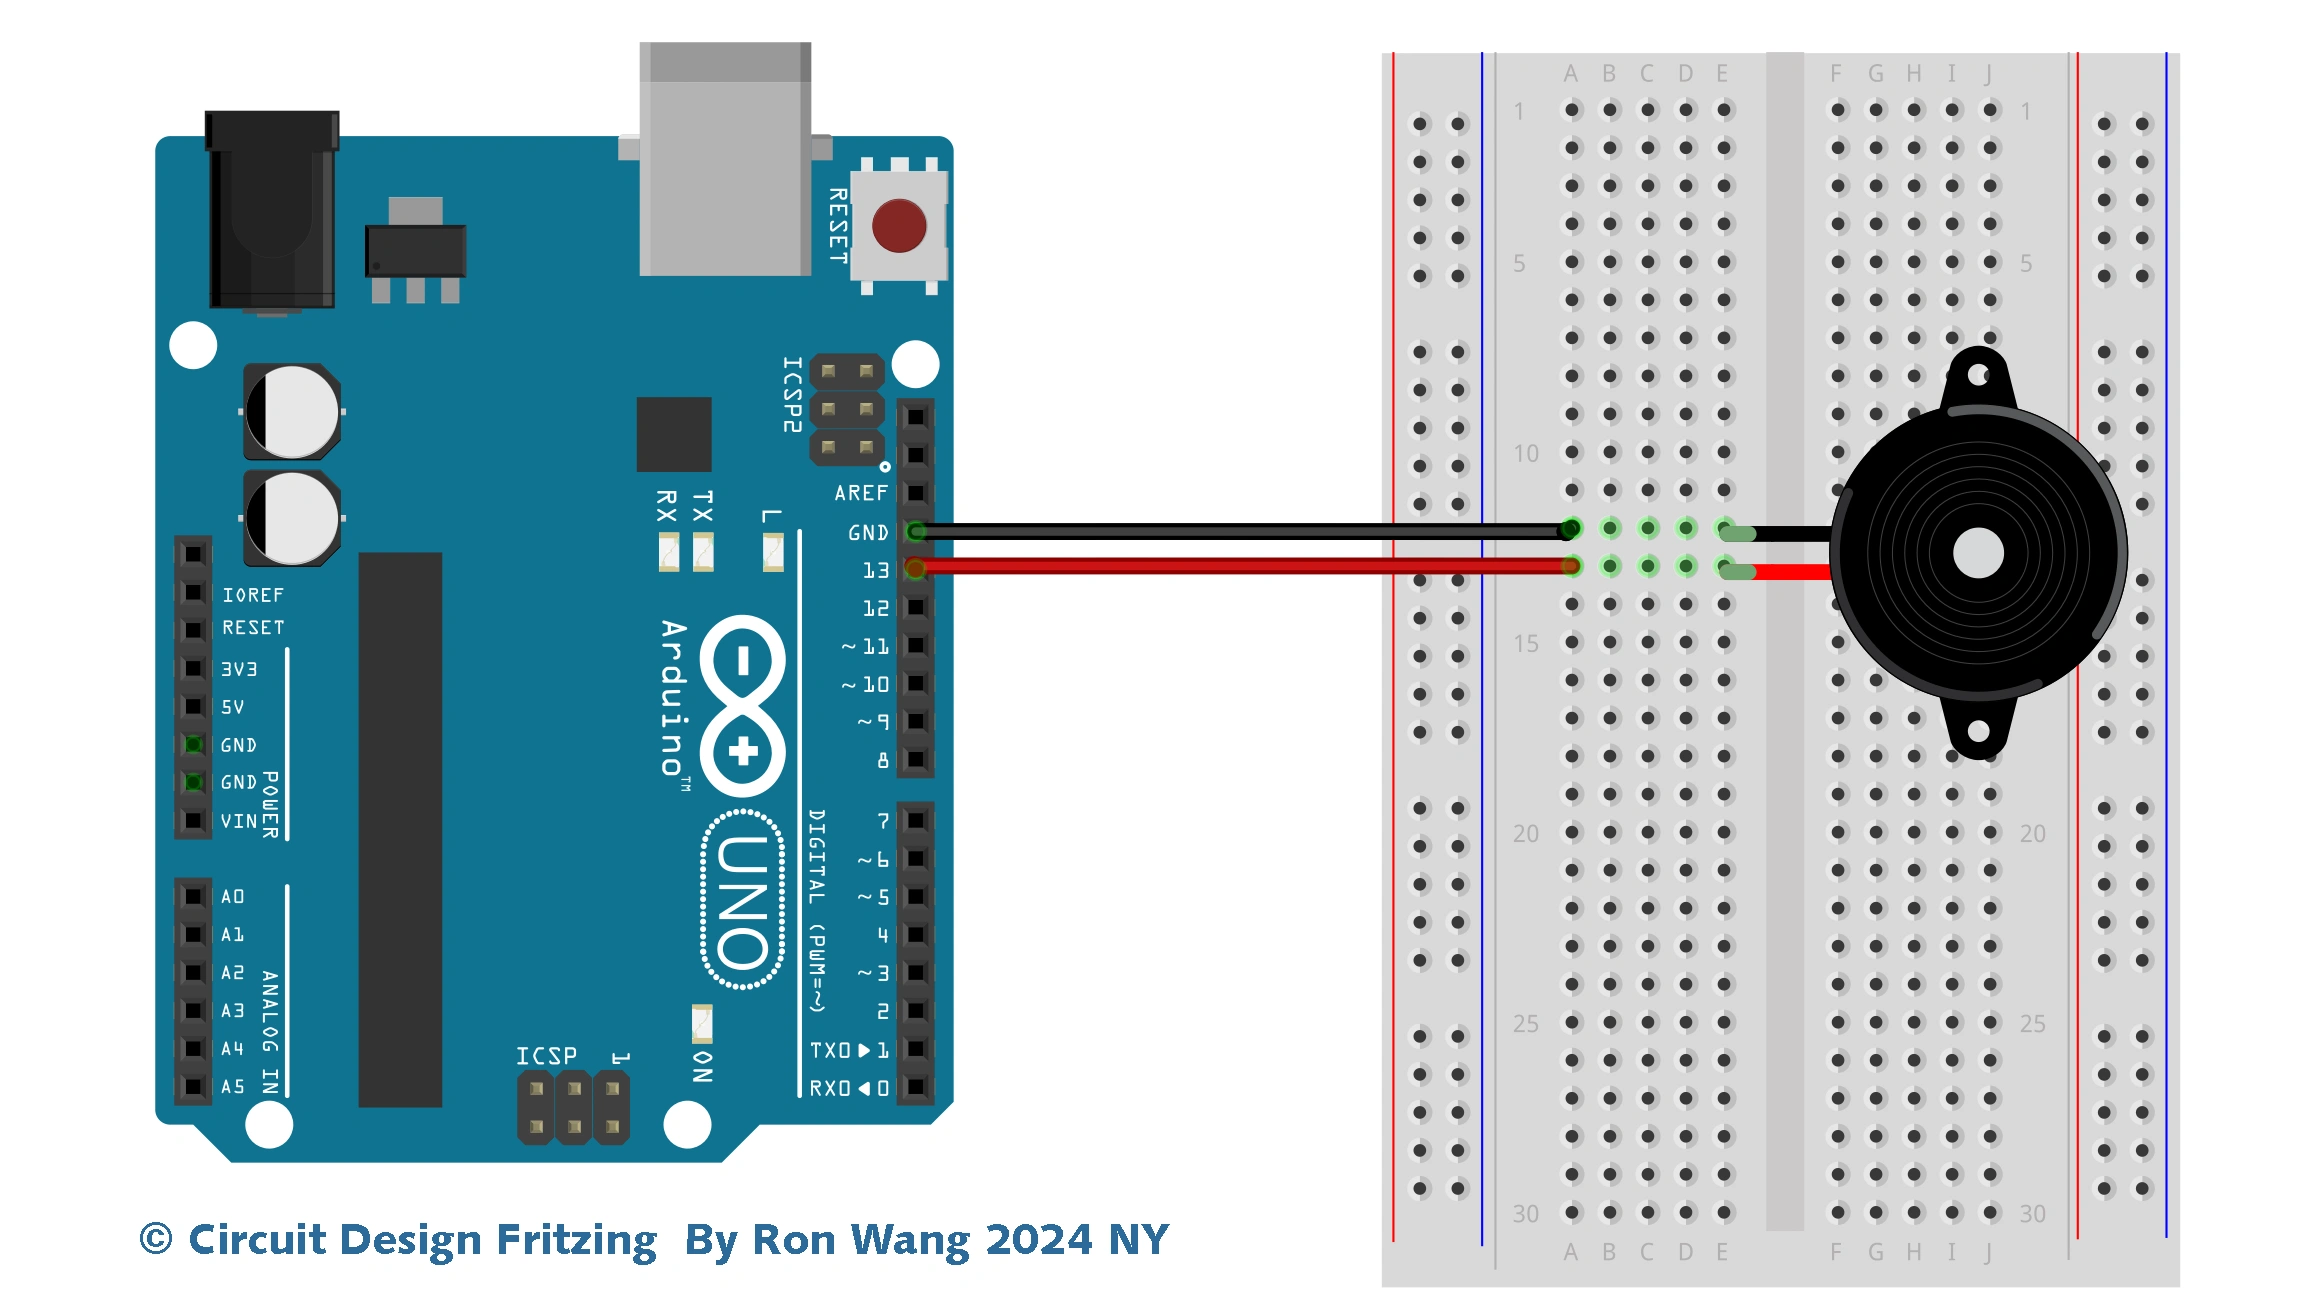
CODE | Dual Servo Control - Arduino Project 026
This project you’ll create another simple project, but this time you’ll control two servos using commands from the serial monitor. You learned about serial control in Project 10 when you were changing the colors on an RGB lamp with serial commands. So let’s cannibalize the code from Project 10 to make this one.
Project 26 Dual Servo Control
/* Coding Ron Wang
   Nov.14th 2024
   Autaba support for coding hardware
   Project 26  Dual Servo Control
 */

#include <Servo.h>
char buffer[10];
Servo servo1; // Create a servo object
Servo servo2; // Create a second servo object
void setup()
{
 servo1.attach(5); // Attaches the servo on pin 5 to the servo1 object
 servo2.attach(6); // Attaches the servo on pin 6 to the servo2 object
 Serial.begin(9600);
 Serial.flush();
 servo1.write(90); // Put servo1 at home position
 servo2.write(90); // Put servo2 at home postion
 Serial.println("STARTING...");
}
void loop()
{
 if (Serial.available() > 0) { // Check if data has been entered
 int index=0;
 delay(100); // Let the buffer fill up
 int numChar = Serial.available(); // Find the string length
if (numChar>10) {
numChar=10;
}
while (numChar--) {
// Fill the buffer with the string
buffer[index++] = Serial.read();
}
splitString(buffer); // Run splitString function
}
}
void splitString(char* data) {
Serial.print("Data entered: ");
Serial.println(data);
char* parameter;
parameter = strtok (data, " ,"); //String to token
while (parameter != NULL) { // If we haven't reached the end of the string...
setServo(parameter); // ...run the setServo function
parameter = strtok (NULL, " ,");
}
// Clear the text and serial buffers
for (int x=0; x<9; x++) {
buffer[x]='\0';
}
Serial.flush();
}
void setServo(char* data) {
if ((data[0] == 'L') || (data[0] == 'l')) {
int firstVal = strtol(data+1, NULL, 10); // String to long integer
firstVal = constrain(firstVal,0,180); // Constrain values
servo1.write(firstVal);
Serial.print("Servo1 is set to: ");
Serial.println(firstVal);
}
if ((data[0] == 'R') || (data[0] == 'r')) {
int secondVal = strtol(data+1, NULL, 10); // String to long integer
secondVal = constrain(secondVal,0,255); // Constrain the values
servo2.write(secondVal);
Serial.print("Servo2 is set to: ");
Serial.println(secondVal);
}
}