CODE | Variables - Arduino Programming Basic
Arduino 程序基础,介绍Arduino程序的基本组成,第一部分编写了10个例子,关于变量及变量名称,串口监视器,if循环,for循环,while循环等。第二部分介绍了函数,全局变量,局部变量和静态变量,数据类型,Bollean运算,注释语句等。
变量及变量名称定义
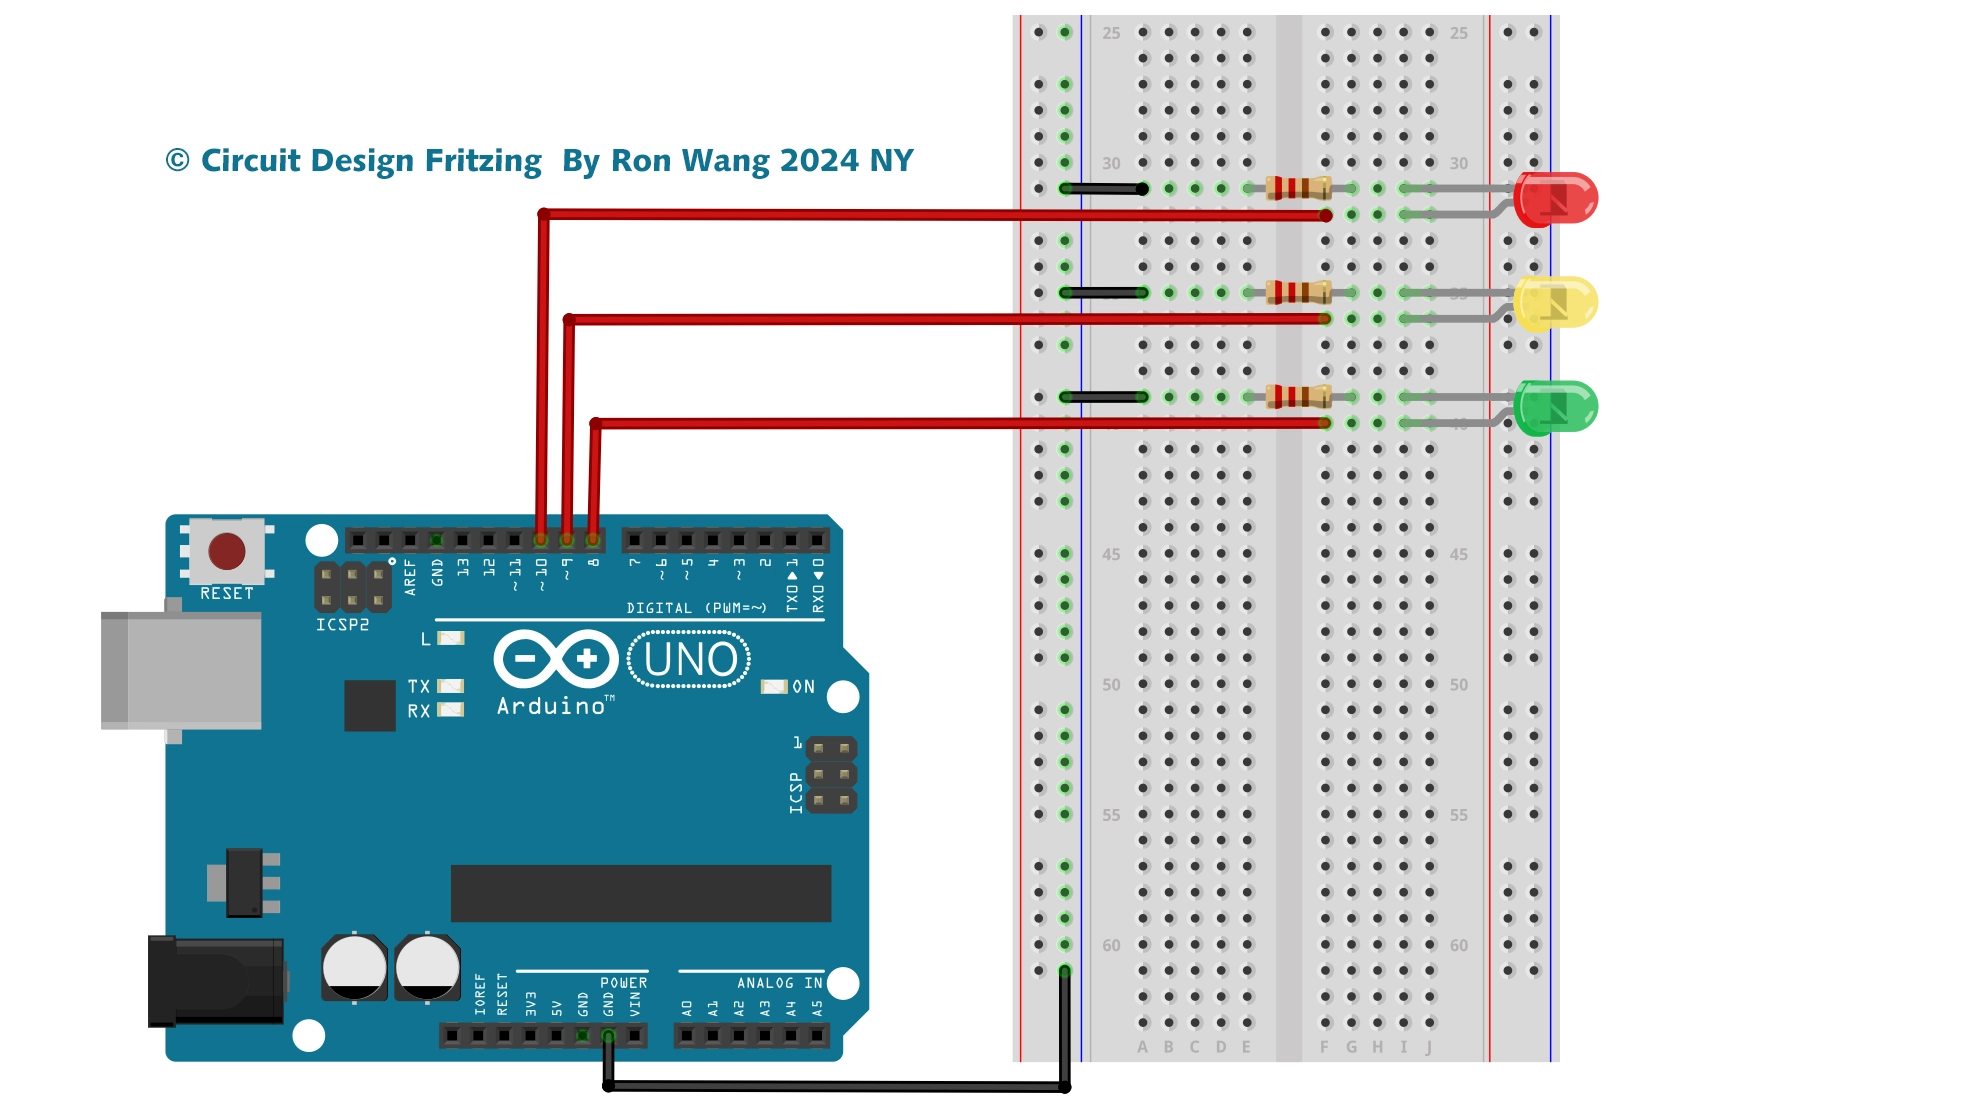
Blink LED 闪灯一次 1-1
void setup() {
  // put your setup code here, to run once:
  pinMode(13,OUTPUT);
  digitalWrite(13,HIGH);
}
void loop() {
  // put your main code here, to run repeatedly:

}
Blink LED 连续闪烁 1-2
void setup() {
  // put your setup code here, to run once:
  pinMode(13,OUTPUT);

}
void loop() {
  // put your main code here, to run repeatedly:
  digitalWrite(13,HIGH);
  delay(500);
  digitalWrite(13,LOW);
}
LED在LOW被关闭的一瞬间立刻被点亮了,速度很快,所以人类肉眼看起来就是常亮的。
在最后再加一句delay(500); 程序看起来就运行正常了,灯开始闪烁了。


Blink LED 连续闪烁 1-3 // 变量
int ledPin = 13;
int delayPeriod = 500 ;

void setup() {
  // put your setup code here, to run once:
  pinMode(ledPin,OUTPUT);

}
void loop() {
  // put your main code here, to run repeatedly:
  digitalWrite(ledPin,HIGH);
  delay(delayPeriod);
  digitalWrite(ledPin,LOW);
  delay(delayPeriod);
}
Blink LED 连续闪烁 1-4 // 变量+循环
int ledPin = 13;
int delayPeriod = 100 ;

void setup() {
  // put your setup code here, to run once:
  pinMode(ledPin,OUTPUT);

}
void loop() {
  // put your main code here, to run repeatedly:
  digitalWrite(ledPin,HIGH);
  delay(delayPeriod);
  digitalWrite(ledPin,LOW);
  delay(delayPeriod);
  delayPeriod =delayPeriod +100 ;
}
局部变量Local Variables,全局变量Global Variables,静态变量 Static Variables 1-5
int ledPin=13;
int delayPeriod =200;

void setup()
{
pinMode(ledPin,OUTPUT);
}

void loop()
{
  static int count=0;
  digitalWrite(ledPin,HIGH);
  delay(delayPeriod);
  digitalWrite(ledPin,LOW);
  delay(delayPeriod);
  count ++ ;
  if (count == 20)
  {
   count=0 ;
   delay(3000);
 }
}
静态变量的意义是变量只在函数第一次运行的时候被初始化,而不是每次运行时都初始化。区别 如果我们不对count=0;定义为Static时,程序在每次循环时都执行一次count=0,所以程序无法正常运行。因为count的值一直等于0,它永远都不会达到20,所以LED会一直闪下去。