CODE | Based Security System with Lcd Display - Arduino Project 046
Components Needed:
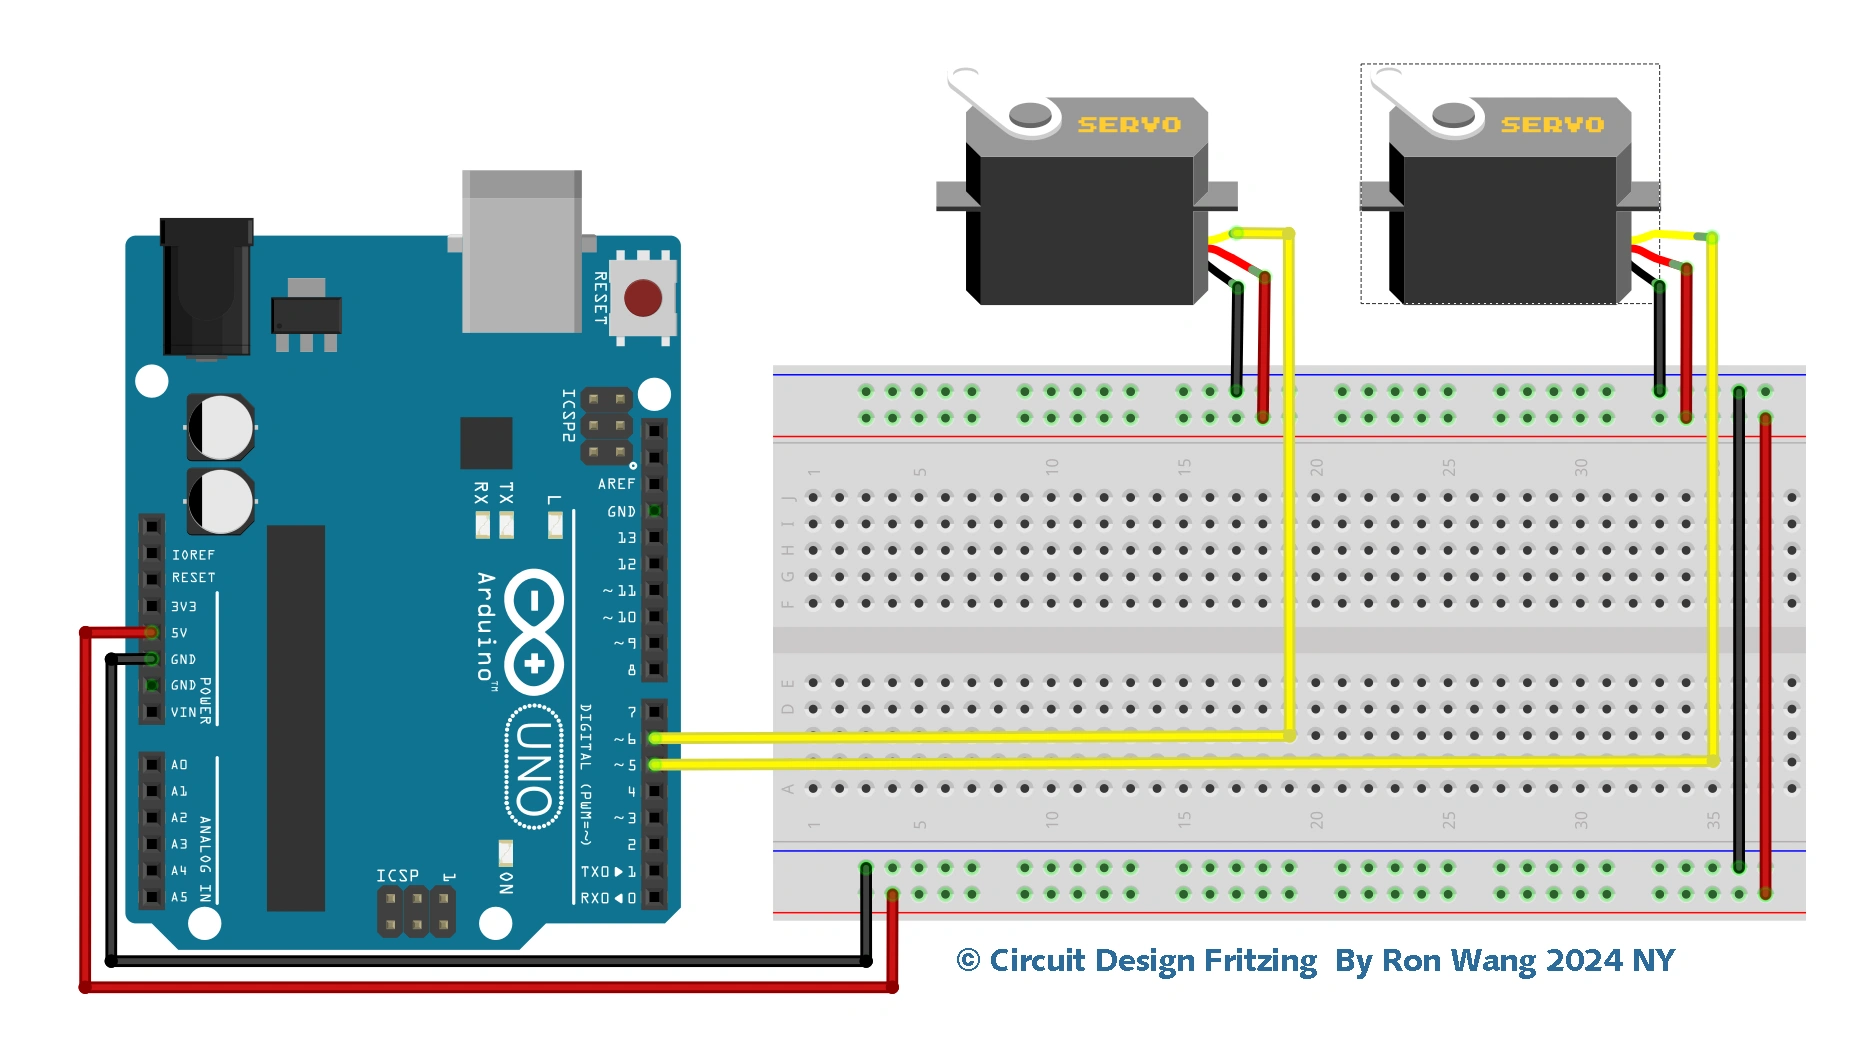
You will need an Arduino (like Arduino Uno or Nano), an LCD display, a keypad, a servo motor, and possibly a buzzer for feedback.
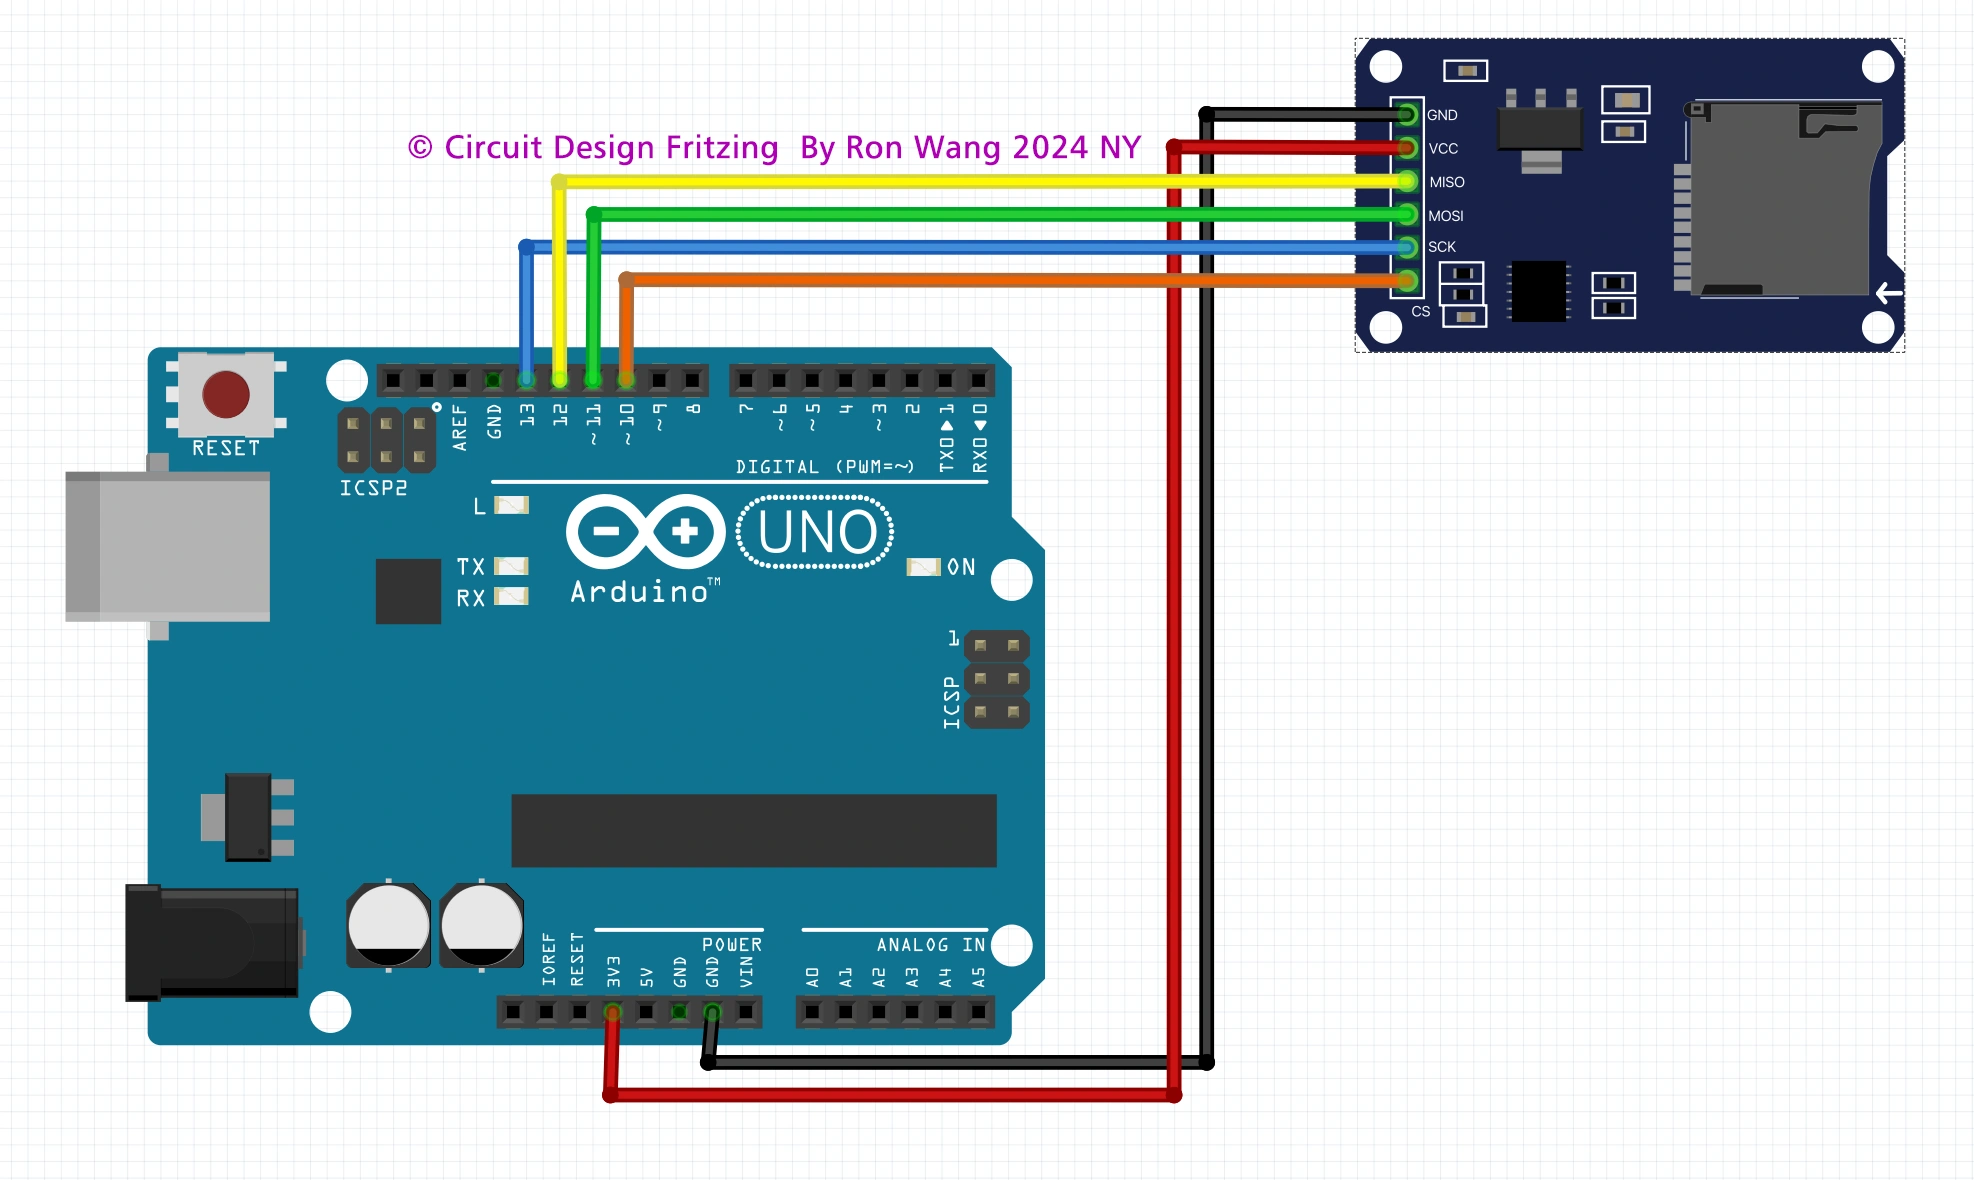
Wiring:
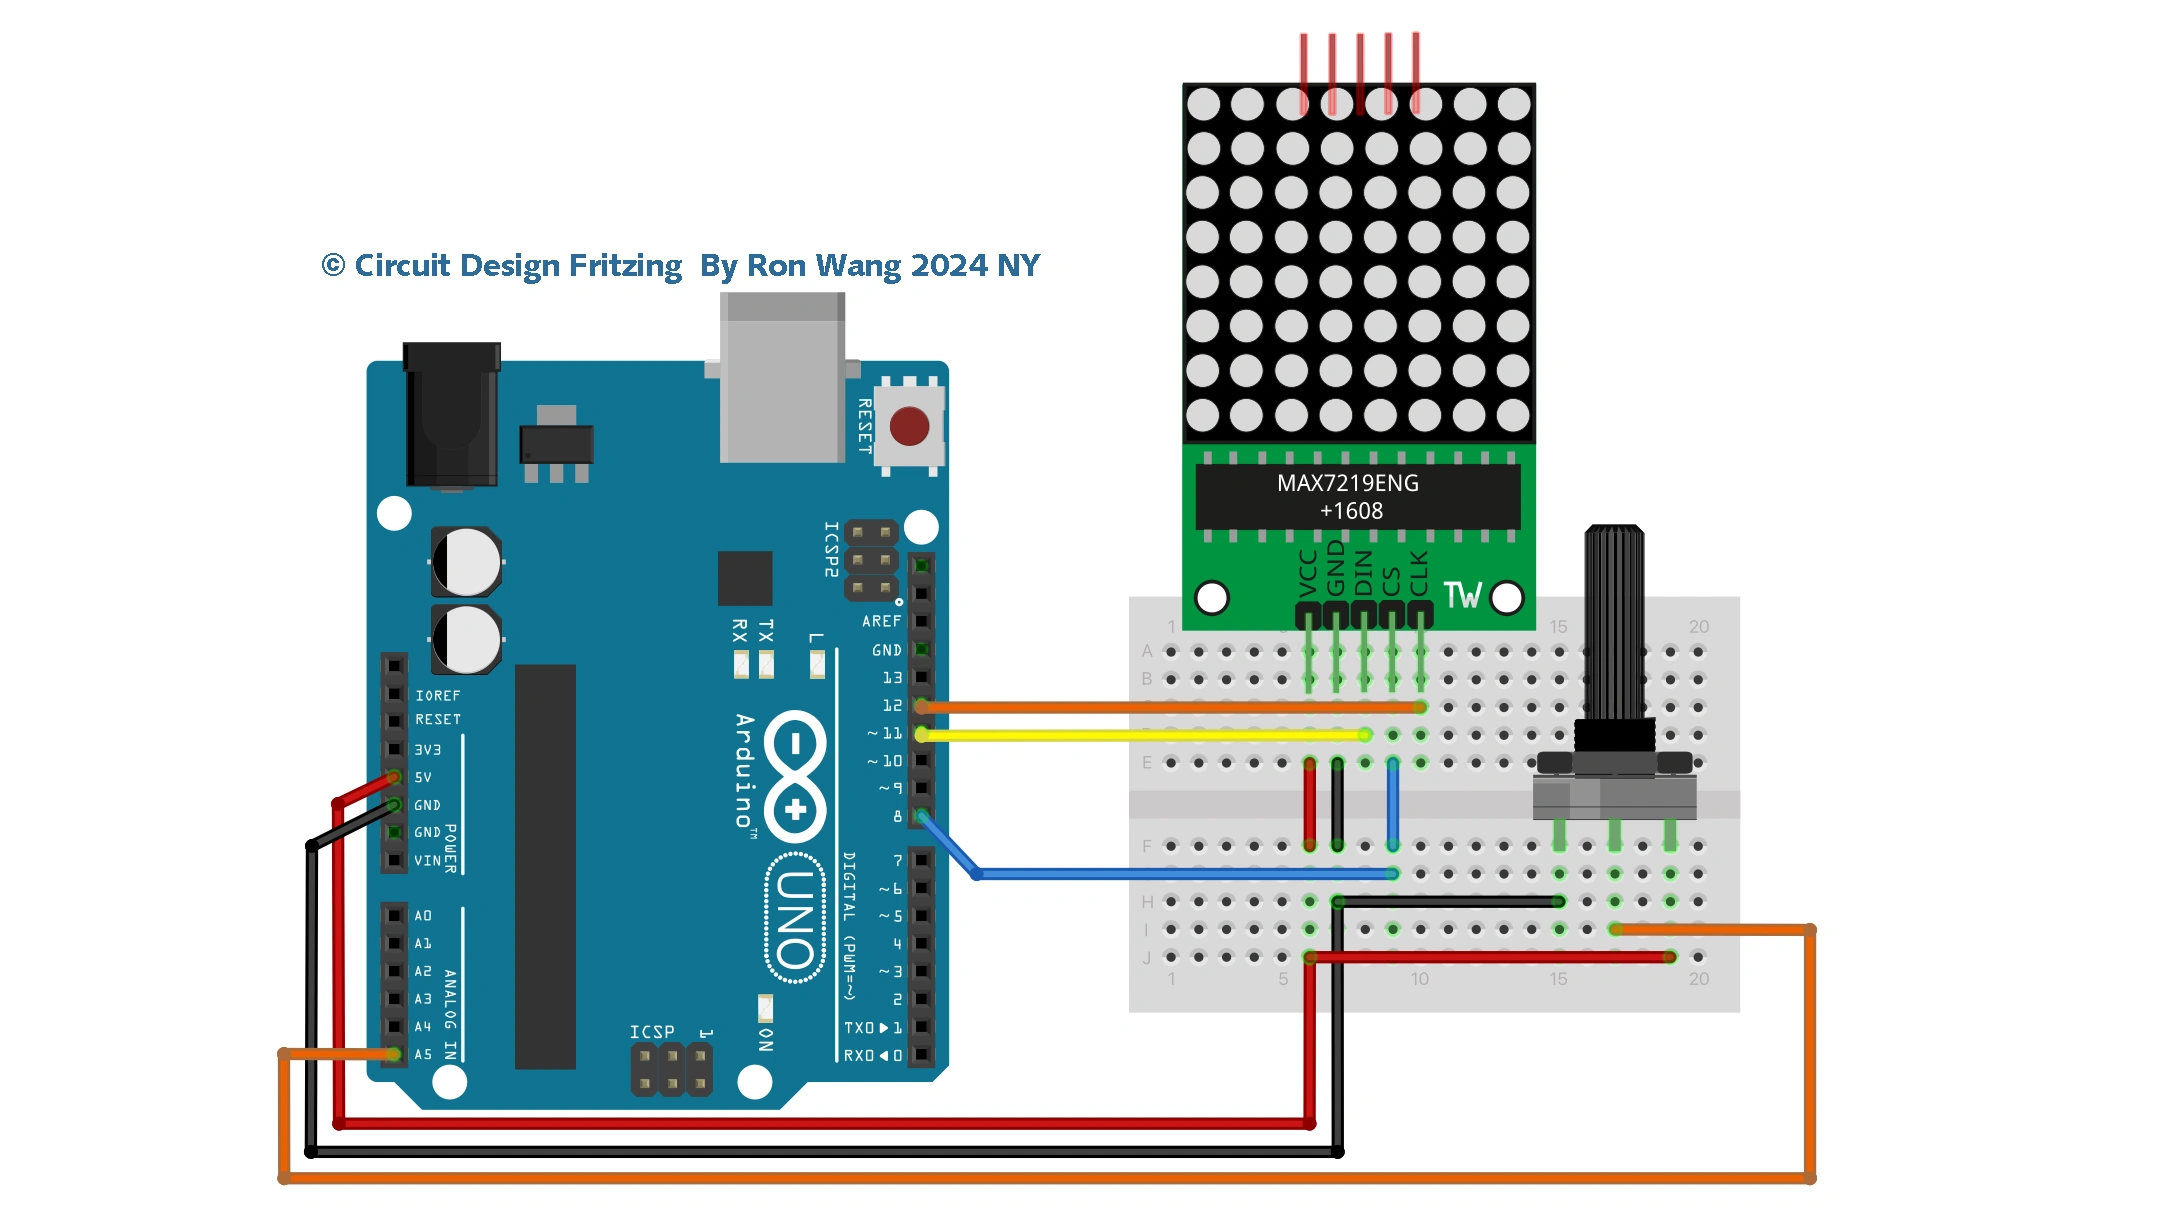
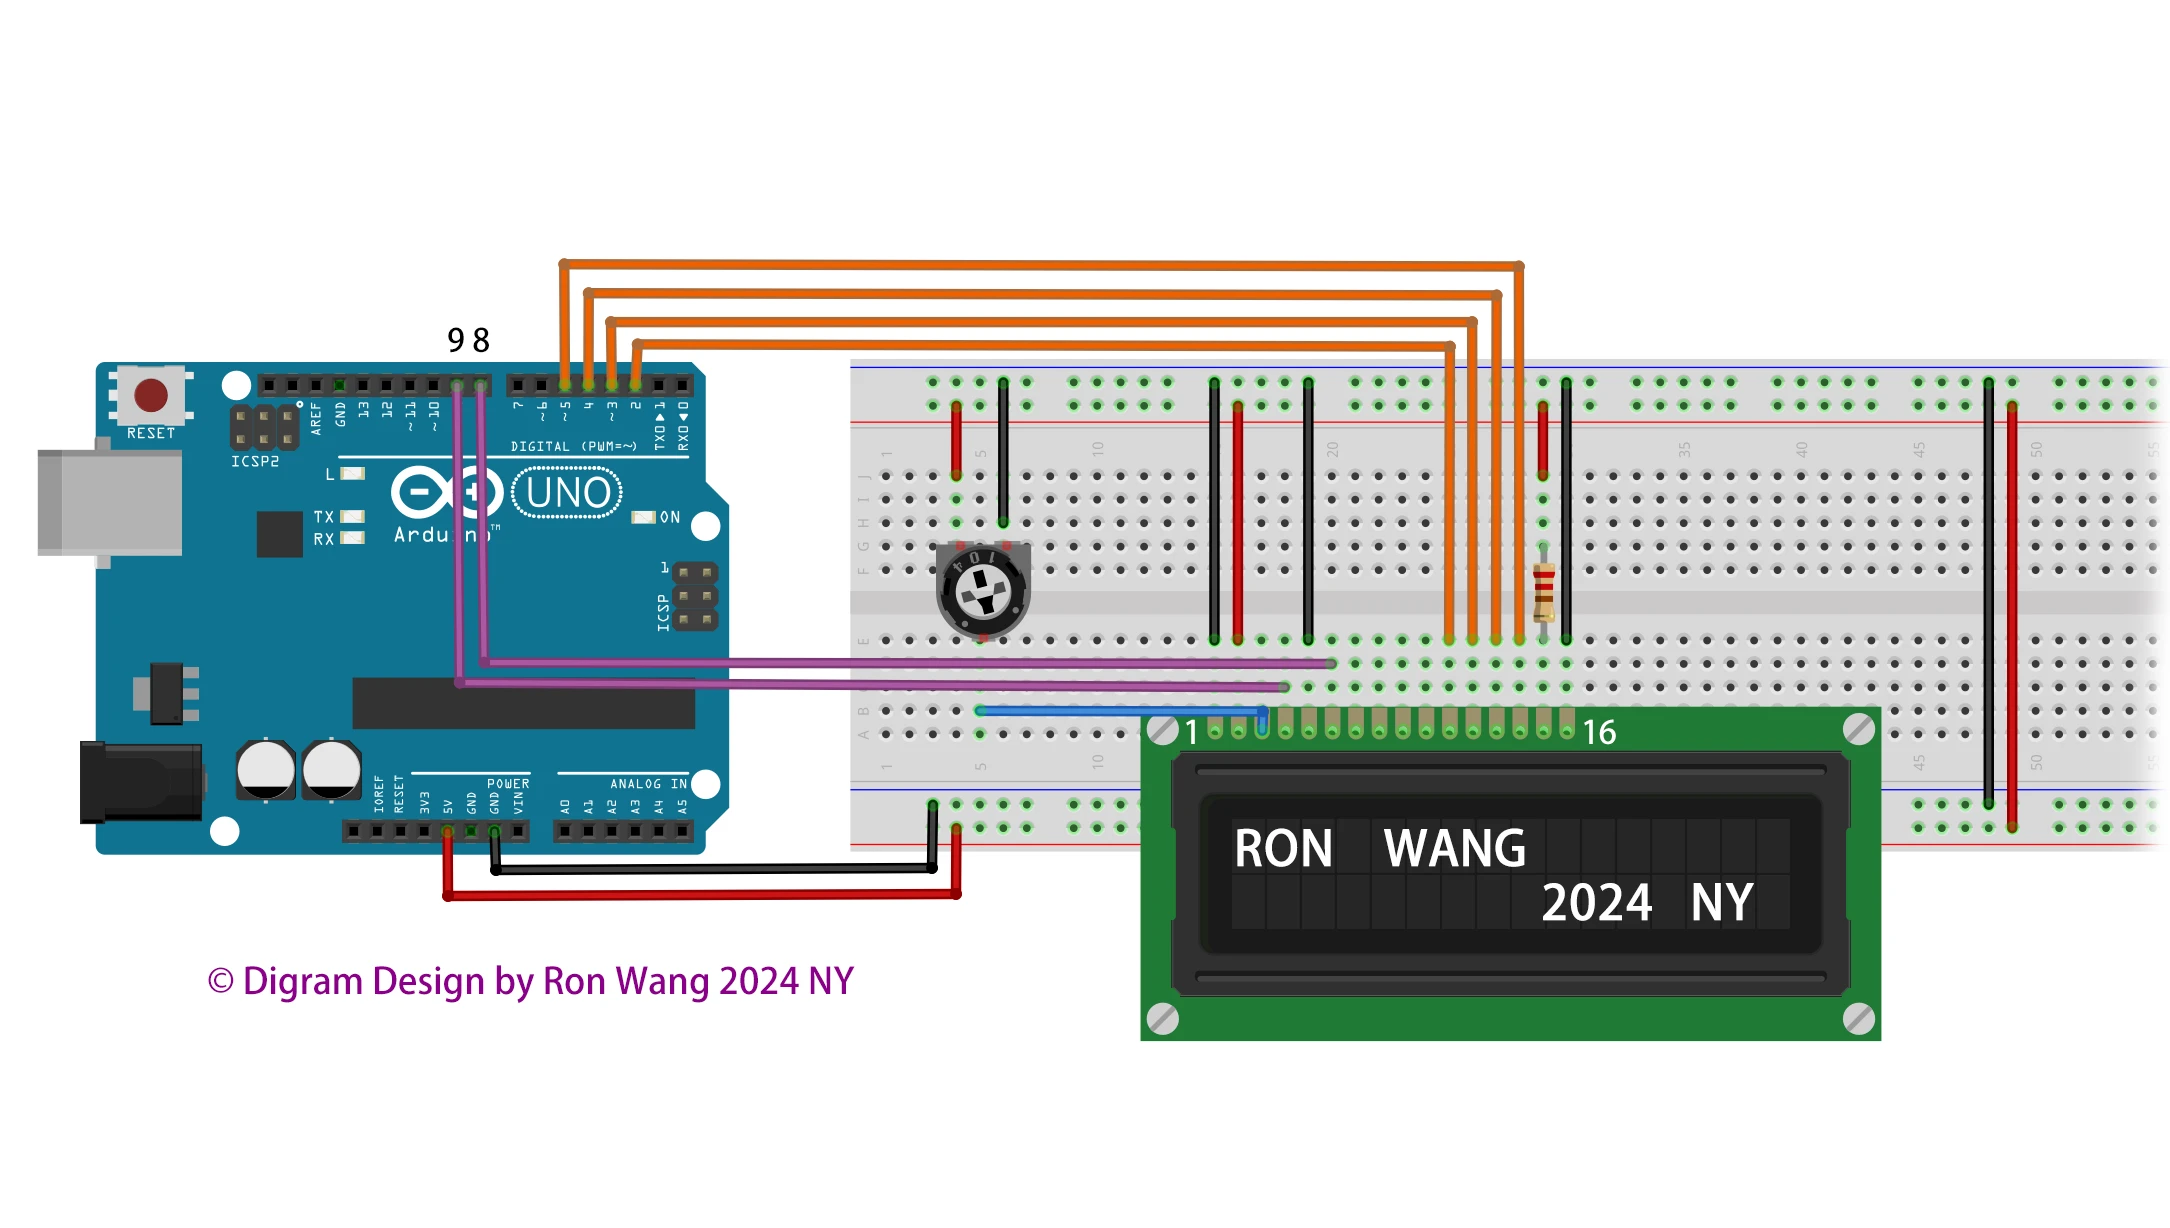
Connect the LCD to the Arduino, the keypad to the Arduino, and the servo motor to the Arduino. Ensure all connections are secure.
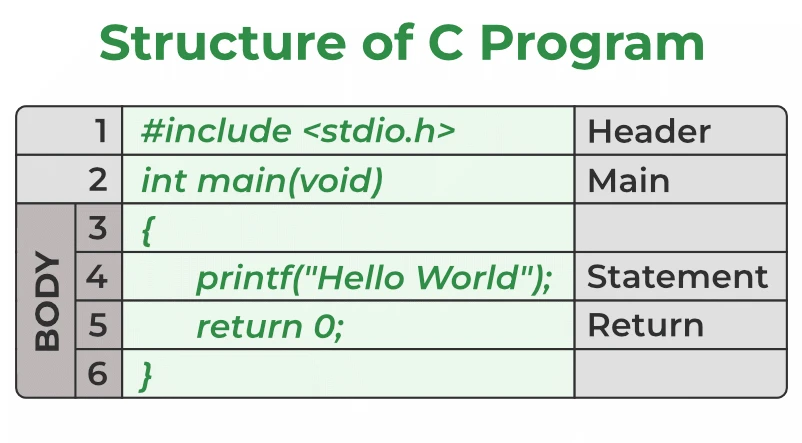
Code Implementation:
Use the Arduino IDE to upload the code. The code will allow you to enter a password, display messages, and control the servo motor to unlock or lock the door.
System Testing:
After uploading the code, test the system by entering the correct password to unlock the door. The LCD will show the status messages and the servo motor will operate accordingly.
Customization:
You can modify the code to suit your specific needs, such as adding additional features or changing the display messages.
For detailed instructions, you can refer to the project guides available on the Arduino Project Hub and other electronics tutorial websites.
Arduino Project 046 -Based Security System by Arduino with Lcd Display


/*
 * Project 046 Based Security System by Arduino with Lcd Display
 *                   RFID-RC522
 */
 #include <SPI.h>
 #include <MFRC522.h>
 #include <LiquidCrystal.h>
 #define SS_PIN 10
 #define RST_PIN 9
 MFRC522 mfrc522(SS_PIN, RST_PIN);  // Create MFRC522 instance.
 #define beep_pin 8
 LiquidCrystal lcd(2, 3, 4, 5, 6, 7);
 void setup()
 {
  Serial.begin(9600);  // Initiate a serial communication
  pinMode(beep_pin,OUTPUT);
  digitalWrite(beep_pin,LOW);
  lcd.begin(16, 2);
  lcd.setCursor(3, 1);
  lcd.print("Welcome!!");
  lcd.setCursor(0, 0);
  lcd.print("Circuit is Ready");
  delay(1500);
  lcd.clear();
  SPI.begin();   // Initiate SPI bus
  mfrc522.PCD_Init();  // Initiate MFRC522
  Serial.println("Put your card to the reader...");
  Serial.println();
 }
 void loop()
 {
  digitalWrite(beep_pin, LOW);
  lcd.clear();
  lcd.setCursor(0, 0);
  lcd.print("Put your card to");
  lcd.setCursor(0, 1);
  lcd.print("the reader......");
  delay(300);
  // Look for new cards
  if ( ! mfrc522.PICC_IsNewCardPresent())
  {
   return;
  }
  // Select one of the cards
  if ( ! mfrc522.PICC_ReadCardSerial())
  {
   return;
  }
  //Show UID on serial monitor
  Serial.print("UID tag :");
  String content= "";
  byte letter;
  for (byte i = 0; i < mfrc522.uid.size; i++)
  {
    Serial.print(mfrc522.uid.uidByte[i] < 0x10 ? " 0" : " ");
    Serial.print(mfrc522.uid.uidByte[i], HEX);
    content.concat(String(mfrc522.uid.uidByte[i] < 0x10 ? " 0" : " "));
    content.concat(String(mfrc522.uid.uidByte[i], HEX));
  }
  Serial.println();
  Serial.print("Message : ");
  content.toUpperCase();
  if (content.substring(1) == "XX XX XX XX") //change here the UID of the card/cards that you want to give access
  {
   digitalWrite(beep_pin,HIGH);
   delay(200);
   digitalWrite(beep_pin,LOW);
   delay(100);
   lcd.setCursor(0, 0);
   lcd.print("ID : ");
   lcd.print(content.substring(1));
   lcd.setCursor(0, 1);
   lcd.print("Authorized access");
   Serial.println("Authorized access");
   delay(1200);
  }
  else  {
   digitalWrite(beep_pin,HIGH);
   lcd.setCursor(0, 0);
   lcd.print("ID : ");
   lcd.print(content.substring(1));
   lcd.setCursor(0, 1);
   lcd.print("Access denied");
   Serial.println(" Access denied");
   delay(1500);
    }
 }