CODE | RFID Servo and LED Control System - Arduino Project 045
Arduino Programming Basic -- RFID Servo and LED Control System
Integrating RFID technology with Arduino allows you to control a servo motor for applications like smart locks, automation, and security systems.
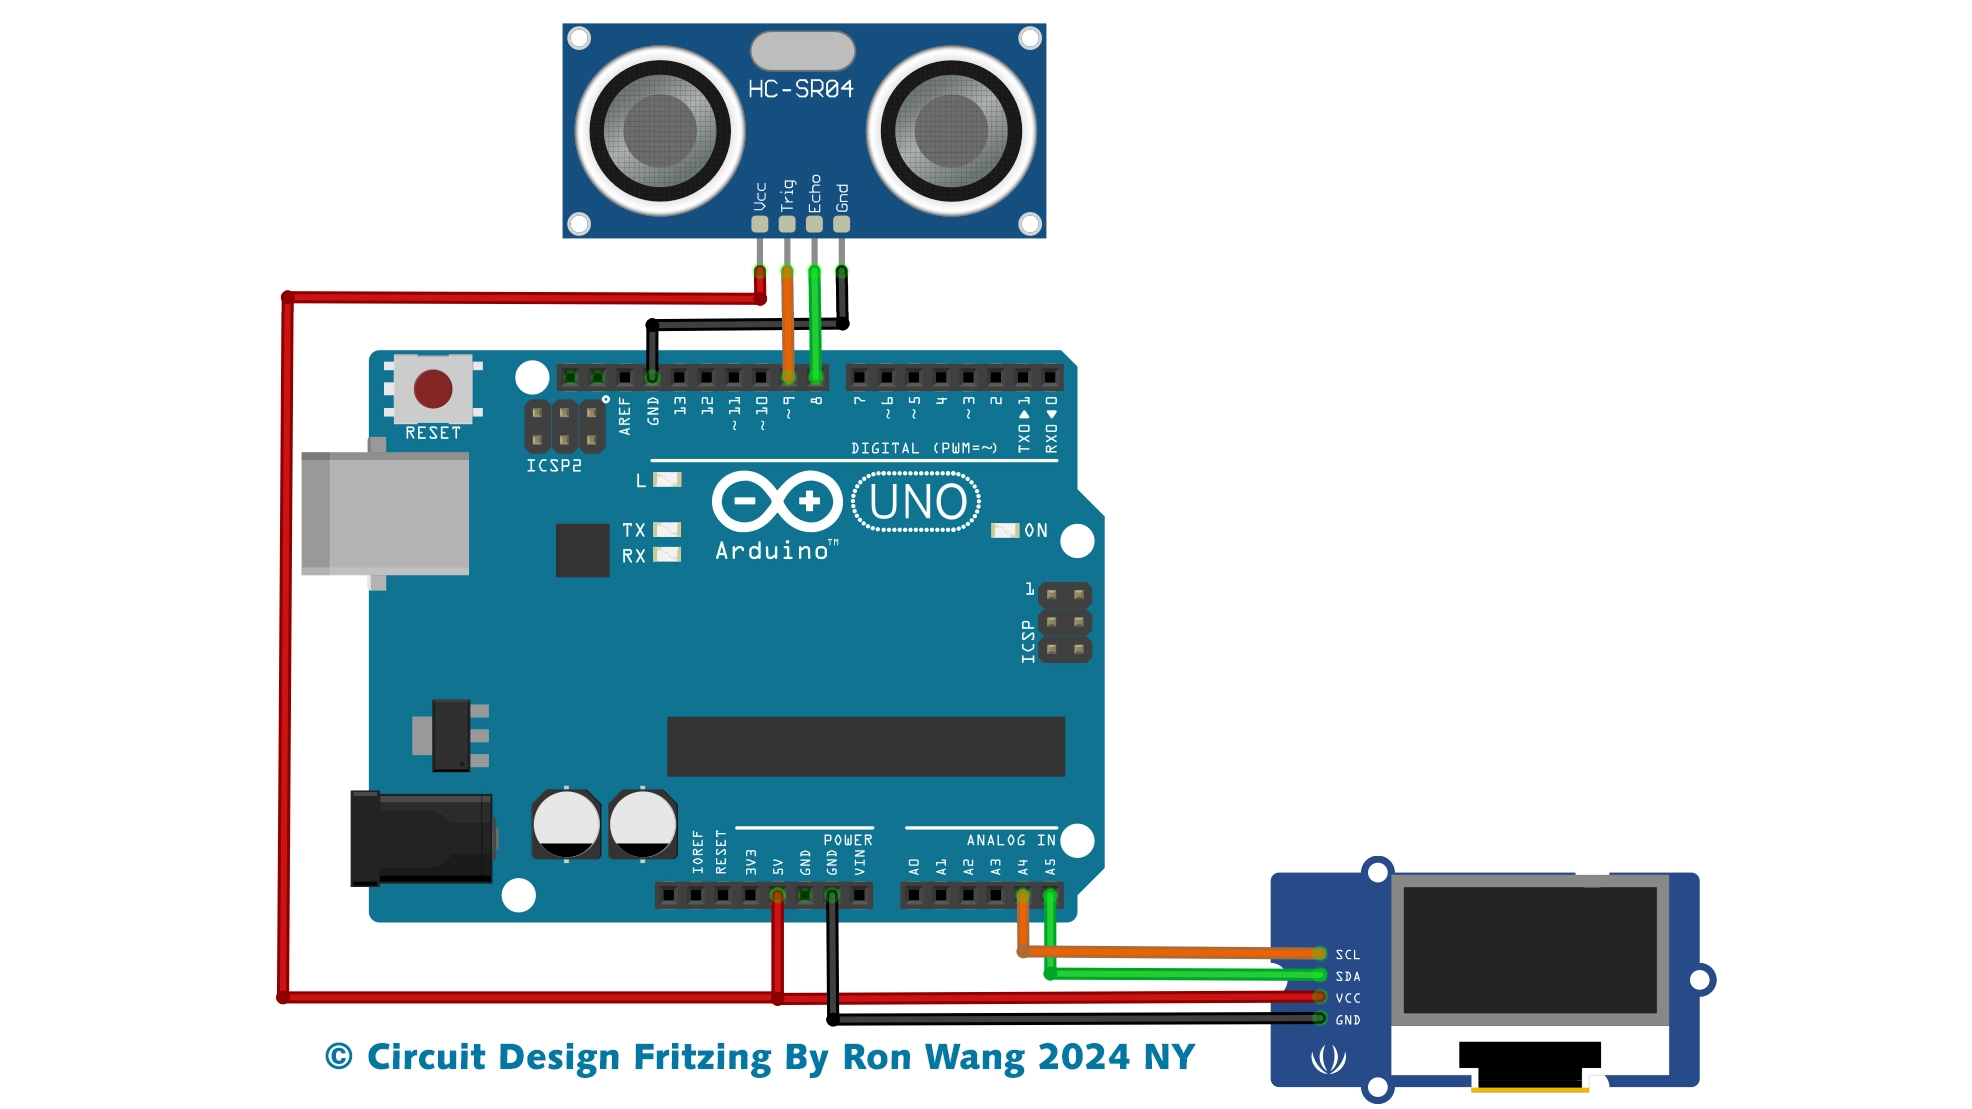
In this project, you will use an RFID reader (like the MFRC522) and a servo motor with an Arduino to create a system that can unlock or control mechanisms based on RFID card detection. This setup is ideal for applications such as smart locks, automated doors, or pet feeders.
Project 45 RFID Servo and LED Control System


RFID Servo and LED indicator Control System
/* Project 45 RFID - Access Servo and Control / Gate LED indicator
   Circuit Design  By Ron Wang 2024 NY
 Schematic Design By Ron Wang 2024 NY
*/
#include <SPI.h>
#include <MFRC522.h>
#include <Servo.h>
Servo microservo9g;
#define SS_PIN 10    // RC522 module pin definitions
#define RST_PIN 9

MFRC522 mfrc522(SS_PIN, RST_PIN);
int led_concedido = 5; // Leds indicating access granted or denied
int led_negado = 6;
char st[20];

void setup()
{
  pinMode(led_concedido, OUTPUT);
  pinMode(led_negado, OUTPUT);
  // Defines that the servo is connected to digital port 3
  microservo9g.attach(3);
  // Moves the servo to the start position (cancel closed)
  microservo9g.write(90);
 // Start the serial
  Serial.begin(9600);
  // Start SPI  Bus
  SPI.begin();
  // Start MFRC522
  mfrc522.PCD_Init();
 // Initial messages on the serial monitor
  Serial.println("Bring your card closer to the reader...");
  Serial.println();
}

void loop()
{
 // Wait for the card to approach
  if ( ! mfrc522.PICC_IsNewCardPresent())
  {
    return;
  }
 // Select one of the cards
  if ( ! mfrc522.PICC_ReadCardSerial())
  {
    return;
  }
 // Show UID on serial
  Serial.print("UID da tag :");
  String conteudo= "";
  byte letra;
  for (byte i = 0; i < mfrc522.uid.size; i++)
  {
     Serial.print(mfrc522.uid.uidByte[i] < 0x10 ? " 0" : " ");
     Serial.print(mfrc522.uid.uidByte[i], HEX);
     conteudo.concat(String(mfrc522.uid.uidByte[i] < 0x10 ? " 0" : " "));
     conteudo.concat(String(mfrc522.uid.uidByte[i], HEX));
  }
  Serial.println();
  Serial.print("Mensagem : ");
  conteudo.toUpperCase();

  // Test if card2 has been read,you can modification the Value your RFID tag value
  if (conteudo.substring(1) == "C1 41 38 1D")
  {
    // Raises the gate and lights the green LED
    microservo9g.write(-90);
    digitalWrite(led_concedido, HIGH);
    Serial.println("Card1 - Access granted!");
    Serial.println();
    delay(3000);
    microservo9g.write(90);
    digitalWrite(led_concedido, LOW);
    }

 // Test if card2 has been read
  if (conteudo.substring(1) == "C1 41 38 1D")
  {
    Serial.println(";Card2 - Access granted!!!");
    Serial.println();
    // Flashes the red LED
    for (int i= 1; i<5 ; i++)
    {
      digitalWrite(led_negado, HIGH);
      delay(200);
      digitalWrite(led_negado, LOW);
      delay(200);
    }
  }
  delay(1000);
}