Unnamed
eerer

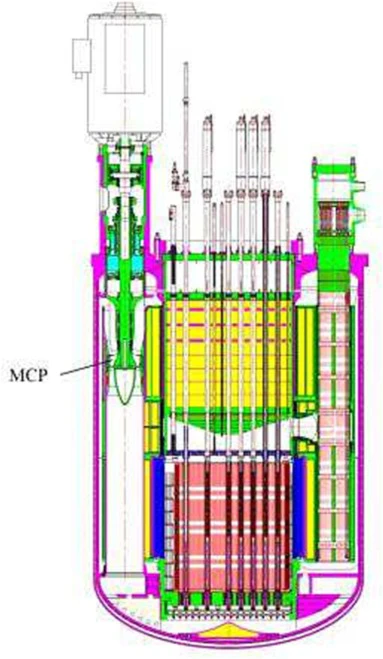
AbstractLead-cooled fast reactor (LFR) has been listed as the most promising fourth-generation react…
eerer…
撰写内容中………
撰写内容中………
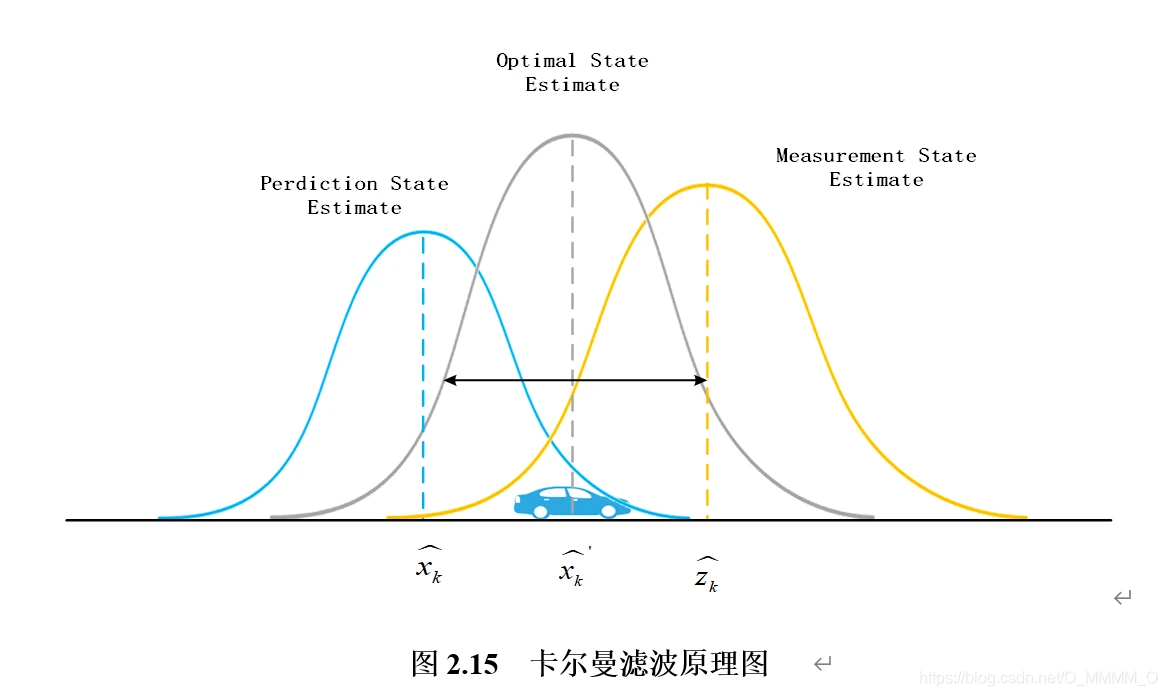
无人驾驶汽车系统入门(一)| 卡尔曼滤波与目标追踪说明:介绍无人驾驶汽车系统感知模块的重要技术——卡尔曼滤波卡尔曼滤波按如下三个章节说明:卡尔曼滤波与行人状态估计扩展卡尔曼滤波(EKF)与传感器融合…
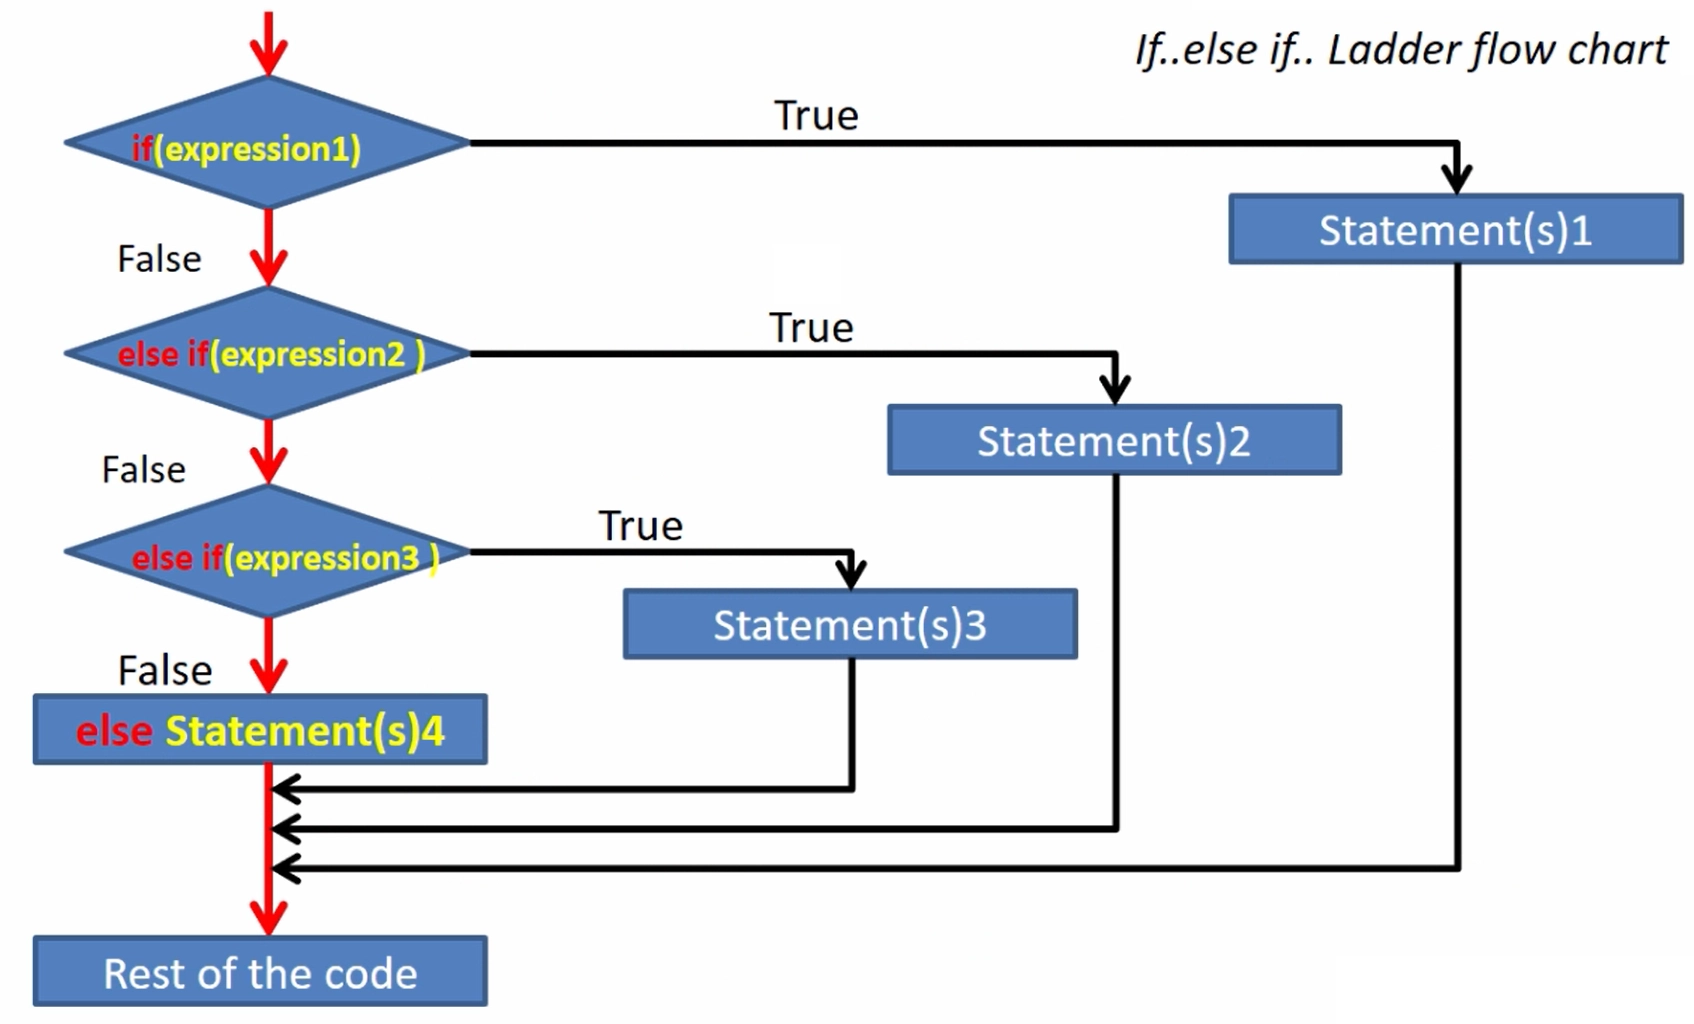
Arduino 程序基础,介绍Arduino程序的基本组成,第一部分编写了10个例子,关于变量及变量名称,串口监视器,if循环,for循环,while循环等。第二部分介绍了函数,全局变量,局部变量和静…
