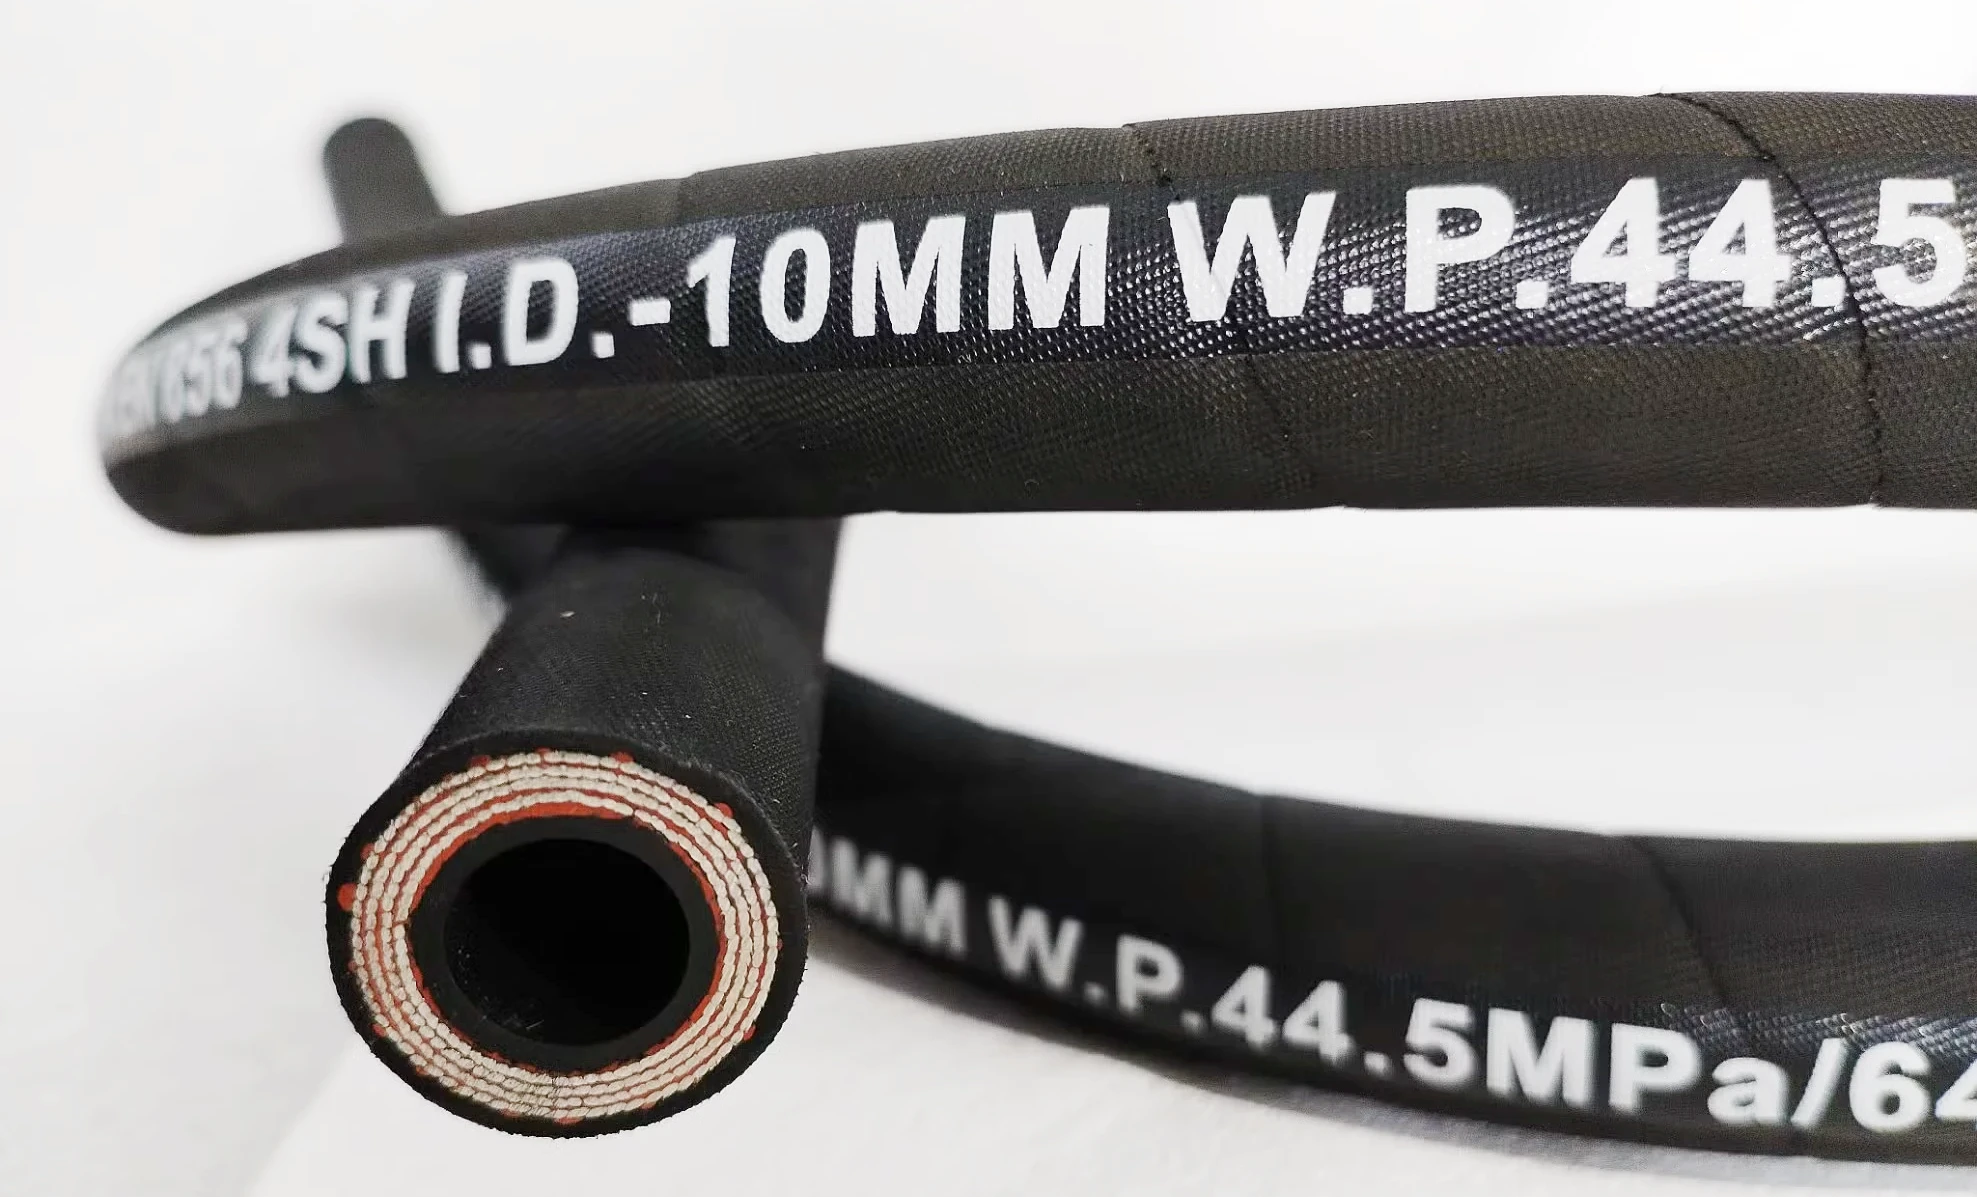
当前位置:首页 > 科学研究 > 电子编程 > 正文内容

Arduino Project 044 - Simple RFID Reader

RonWang9个月前 (12-11)电子编程504

Arduino Programming Basic -- Making an RFID Reader

Project 44 Simple RFID Reader

Arduino RFID RC522

Wiring Diagram Between RC522 and Arduino without voltage regulator

Arduino RFID RC522 Resistor

Wiring Diagram Between RC522 and Arduino with voltage regulator

As Circuit in the wiring diagram above, 1kOhM and 2kOhm pair of resistors are used to regulate 5V to 3.3V. It does not need to adjust the voltage between the Arduino pin and the MISO pin of the RC522 module. However, it is necessary to regulate the voltage between the Arduino pins and the SS, SCK, MOSI, and RST pins of the RC522 module.

// Project 44  Simple RFID Reader   Arduino-RFID-NFC

#include <SPI.h>
#include <MFRC522.h>

#define SS_PIN 10
#define RST_PIN 5

MFRC522 rfid(SS_PIN, RST_PIN);

void setup() {
  Serial.begin(9600);
  SPI.begin(); // init SPI bus
  rfid.PCD_Init(); // init MFRC522

  Serial.println("Tap RFID/NFC Tag on reader");
}

void loop() {
  if (rfid.PICC_IsNewCardPresent()) { // new tag is available
    if (rfid.PICC_ReadCardSerial()) { // NUID has been readed
      MFRC522::PICC_Type piccType = rfid.PICC_GetType(rfid.uid.sak);
      //Serial.print("RFID/NFC Tag Type: ");
      //Serial.println(rfid.PICC_GetTypeName(piccType));

      // print NUID in Serial Monitor in the hex format
      Serial.print("UID:");
      for (int i = 0; i < rfid.uid.size; i++) {
        Serial.print(rfid.uid.uidByte[i] < 0x10 ? " 0" : " ");
        Serial.print(rfid.uid.uidByte[i], HEX);
      }
      Serial.println();

      rfid.PICC_HaltA(); // halt PICC
      rfid.PCD_StopCrypto1(); // stop encryption on PCD
    }
  }
}

版权声明:本文为原创文章,版权归donstudio所有,欢迎分享本文,转载请保留出处!

本文链接:http://www.donstudio.cn/?id=301

标签: Arduino

相关文章

 Arduino Project 037 - 18B20 Temperature Sensor

Arduino Project 037 - 18B20 Temperature Sensor

The DS18B20 Temperature Sensor is a digital temperature sensor capable of measuring temperatures wit...

Arduino Project 016 - L293D Motor Driver IC

Arduino Project 016 - L293D Motor Driver IC

In the previous project, you used a transistor to control the motor. In this project, you are going...

Arduino Project 020 -  LED Dot Matrix Display - Beat Heart

Arduino Project 020 - LED Dot Matrix Display - Beat Heart

You’re going to use the same circuit, but with a slight variation in the code to create a multi-fram...

Arduino Project 040 - Ultrasonic Distance Alarm

Arduino Project 040 - Ultrasonic Distance Alarm

The sensor consists of two primary components: a transmitter and a receiver . The transmitter is res...

Arduino Project 006 - LED Interactive Chase Effect

Arduino Project 006 - LED Interactive Chase Effect

Leave your circuit board intact from Project 5. You’re just going to add a potentiometer to this cir...

Arduino Project 034 - TM1637 4Digital 7Segment Display Module

Arduino Project 034 - TM1637 4Digital 7Segment Display Module

A standard 4-digit 7-segment display is needed for clock, timer and counter projects, but it usually...